Pages

Showing posts with label Guest House. Show all posts

24 September, 2010

Matthew - Lucky Thirteen?

Not that I'm particularly religious, in fact, far from it, but it is curious that in the Gospel of Matthew, he talks about flooding other disasters and the need for preparedness. Ok, maybe he's not necessarily talking about a tropical storm or hurricane, but it's certainly appropriate for today anyway.
4:00 AM Friday, Mathew's Projected Track
Also, not being overly superstitious, Matthew is the thirteenth named storm of the Atlantic hurricane season.  Each time I look at the updated projected track from NOAA's National Hurricane Center, it looks a smidge more favorable for us. I think we're still going to get a soaking out of the whole thing.

So, taking Matthew's words on preparedness to heart, and the fact that preparedness was my game for many years, we spent most of yesterday, doing just that - getting prepared. We moved the bed and futon we had in storage downstairs in the house over to the guesthouse.
Comfy Looking in the Bedroom
Futon Makes A Very Comfy Couch
We've moved bottles of water in, we have our solar-powered radio, lantern, flashlights, books, computers, important papers and records, supplies, kitty and dog stuff, and a whole bunch of other stuff in the guesthouse as well. In short, following our Hurricane Preparedness Checklist.

We're looking at this as, more or less, a test of our preparedness process. So, after the fact, we'll let you know how we did.

If Matthew makes it to hurricane strength, I'll more than likely take down the dishes. If that occurs, I won't be making any more posts till I restore them after the storm. We'll see.

We've had rain off and on throughout the night. I just heard a car go by and the road sounds pretty sloppy, so walkies for the dogs is doubtful today. Which means we can get right to it and continue with preparations.

20 August, 2010

hospes domus exertus cedo

That translates from the Latin roughly, Guesthouse Projects Proceeding.
Guesthouse Kitchen Faucet
The latest project I've been working on is installing the kitchen faucet for the guesthouse. It's a beaut. We had gone to Chetumal to look at several places for kitchen faucets. We didn't really see anything we liked and they weren't very cheap. So, I went back to Lano's Supply and looked at their faucets and we bought one.

Drilled a hole in the resin and fiberglass sink, got the faucet installed. This took a while as I though we had a leak in the faucet after I first hooked it up. Turns out a gasket was missing in the hand sprayer, which Lano's replaced, free of charge.

Next up is the one I'm currently working on.
Under Sink Kitchen Drain
This bit has gone from bad to worse. It started as a small drip at the p-trap, and has now grown to a steady stream. Very frustrating. I'm currently rebuilding the white drain pipe assembly and will rework the glued connection to the stand-pipe. I think I've got some angles wrong. But we'll get it sorted out soon. It's just frustrating in that this side is the non-pressurized side, and the leak has gotten worse the more I've tinkered with it.
---------------------------
On the other hand, a miss is as good as a mile, especially if it's visible for a mile or more. In this case, it's the new construction and signage on the forth floor of the new Cinty's building.
Phillip Batty dna Sons
We noticed this one the other day, of course, while walking the doggies.

10 July, 2010

More on the Kitchen Cabinets

I had a bit more time today so I took a few more detailed shots of the kitchen cabinets. We'll start with the upper corner cabinet. It has a double door with a piano hinge providing great access to the huge corner area.
Double-Door Corner Cabinet
Next, is a shot of the new stove vent fan I picked up just this morning. Of course, it's still waiting for me to install it.
New Stove Vent Fan
And that's waiting for me to find some 6" or 7" rigid vent piping. I haven't even begun to look for it, so I don't know about the availability. If I can find it in Corozal, that'll be a high-five moment.
Above Stove Where Vent Fan Will Be Installed
Above is where the vent fan will be installed. Of course, I have to cut holes in the top, bottom, and shelf of the cabinet for the vent piping. In addition, I'll have to cut through the concrete wall to vent the stove effluvia to the outside.

I had mentioned that I had re-routed some wiring to the inside of one of the cabinets. Here's a view of that job. I took the opportunity to mount the roll-up door controller in the same cabinet. Turned out pretty neat if I do say so.
Wiring inside the cabinet
Moving on around, here's the lower cabinet to the left of where the stove will be. Each drawer can be rolled out for it's full length. Kind of a nice touch for heavy pots and pans.
Slide 'Em Out, Push 'Em In
The island can do double duty as a food preparation area - its top is actually a cutting board surface. Half of the table can be folded up. It's legs drop out automatically. We think it will provide a nice space-saving table of real use to whoever stays here as well as us besides.
Island Table Top/Work Surface
Besides, the island is on wheels and rolls around, expanding it's utility and flexibility. It also has a large storage area under the work surface.
Island Storage Area
The final bit is the crown molding that runs around the top edge of the upper cabinets.
Crown Molding Sets the Cabinets Off Just Right
Ok. That's enough on the cabinetry for the time being. Hope you enjoy.

04 June, 2010

Every Day's a Big Day Tuesday

I started out to title this posting 'Big Day Tuesday'. I changed my mind. Events just move too fast. I'll see if I can get caught up here.

What better way to get started than having a nice comfortable throne? Here's a shot of our newly installed 'terlet' - fully functioning too.
The Throne
It does still have one tiny leak. The right-side bolt that holds the tank to the bowl still leaks. I haven't been able to entirely stop it yet. I'm looking for an easy solution, so far it's avoiding me.
Windows Arriving
And on Tuesday (the day that started this post), at about 9:30 AM, or so, Roger, from Capital Factory (http://www.capitalfactory.bz/) here in Corozal, showed up with his crew and a full load of louvered windows, sliding glass doors and a roll-up door. They wasted no time beginning the unloading process.
Windows Stacked Everywhere
And, as fast as the windows came in, here comes tromping up onto the deck, this huge contraption - our new 'roll-up' door.
Roll-up Arriving
Looking huge, as it arrived, and even larger after it got installed, the roll-up door is quite the piece of machinery.
Roll-up On Deck
Of course, what we were most excited about, and what the real purpose of the roll-up door is for, that's to protect the double sliding glass doors that are the next thing to be pulled out of the magician's hat, er, truck.
Screen Doors Waiting Their Turn
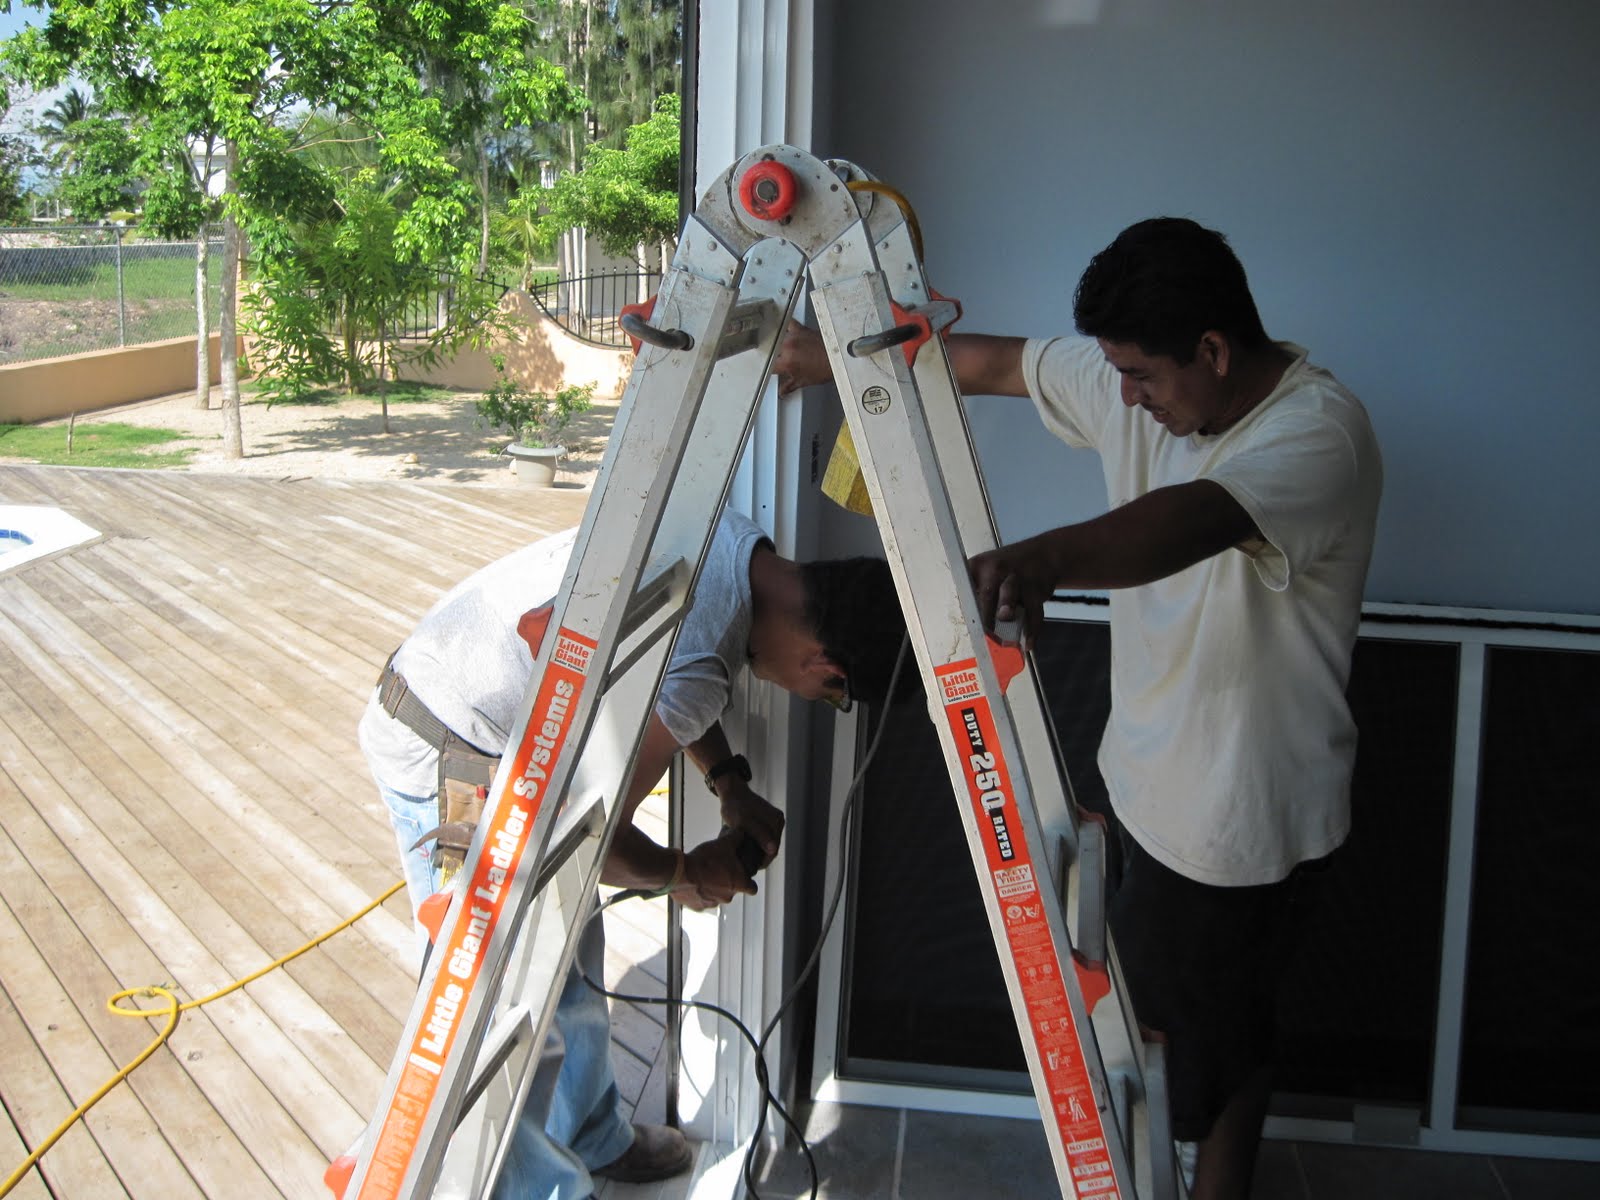
But, unless we get the louvered windows installed first, nothing else happens. So Roger took the bull by the horns, and started the installation process with the first louvers going into the bathroom. I swear it was already a little cooler just with him doing that.
First Window Being Installed
To be honest, while the windows were being installed, part of Roger's crew was working on getting ready to install the roll-up. Here, they're getting ready to drill for the mounting bolts.
Is This Thing Level?
And magically, the roll-up is up. Actually, it did go up rather fast. Unfortunately, the size of the box for the roll-up covered the boxes we had in place in the wall for a couple of lights, one on either side of the doorway. We'll have to figure some way to deal with that later on.
Roll-up Is Up!
Right after mounting the roller assembly, comes the motor. This is made by the same Chinese company that made our gate motor (Dongrong), which has be virtually trouble free in over two years of continuous operation.
Next Up - the Motor
After the motor, then comes the 'curtain' as it's called. The metal fabric that is actually the part of the assembly that goes up and down. I suspect it weighs a bit.
Roll-up Curtain Arrives
Next, they have to get the curtain up to the roller. A simple way is to rig a couple of rope slings to rest the curtain in as they spin it around to find the end piece that actually becomes attached to the roller.
Ready to Hoist the Curtain
That in turn gets fasted to the roller with one metal screw. That is, until they make sure the curtain is rolling square to the roller. And they can't determine that until they get the two guides temporarily installed on either side of the doorway. An involved process for sure.
The Turn of the Screw
Ok. So now, it looks pretty level. Just a bit more adjusting and it'll be ready to roll up as a roll-up should... or, something like that.
Making Sure It's Level
Here's a quick glimpse of what the roll-up looks like, at this stage, from the inside.
Pretty Solid
While all this work was taking place, there had to be some supervision. Here's Dianna and Cody checking progress from the shade of our little gumbo limbo tree by the canal.
Supervising's Hard Work
Here's the final assembly of the curtain - Lots of screws hold it to the roller.
Final Attachment
Just so you don't forget, there was a whole other group of worker-bees putting the window louvers into place at the same time the roll-up was being worked on.
Windows in Bedroom #1
Part of the installation process is making sure the window opening is sufficiently large to accommodate the louvers. Here, Roger is using a hatchet to trim off some concrete from the kitchen window. Some windows, like this, were almost a glove-tight fit. Others, had quite a large gap. You'll see how it gets filled in later on.
Roger Adjusting Kitchen Window Opening
As you can see, Roger is a man of many talents. Not only adusting window openings, but as you can see  below, pretty good at the assembly game as well. Here, he's getting the frame set up to be slid into place to hold the sliding glass doors.
Roger Assembling the Sliding Door Frame
Here's a shot of the crew installing the framework for the sliding glass doors.
Installing Slider Frame
Next up, once the frame is screwed into place is the installation of the sliding glass doors, and in this case, installation of the two outer non-slider glass doors.
 Sliding glass doors Arriving
In pretty short order, it begins to look a lot like sliding glass.
Couple of Glass Doors On Track
I took advantage of having the pool deck umbrella open to shoot this shot of the glass doors. Starting to look pretty good if I do say so myself.
All Four In Place
We wanted to have the roll-up look a little classy, so we order it to come with a cover. Here, they're hoisting it into place.
Roll-up Cover Going Into Place
In case I didn't mention it (I didn't), this turned out to be an all day evolution. Roger and his crew didn't leave until after 5:30 PM. They worked hard too.
Cover's Almost Done
One of the last things they had to install was the motor cover. As you can see, the wiring is not completed. As Roger said, "We leave that to the electrician." Good thing I have one on tap.
Installing the Motor Cover
At this time of the day, there's just a little left to do. Pick up the debris, tools, and all the bits and pieces that result from an installation.
Everything Is Just About Done
There's just one tiny little thing left to do. That's to caulk across the top to fill in the gaposis between the slider frame and the concrete of the doorway opening. It's uneven, naturally, about three-eighths of an inch on the left side, tapering down to less than an eighth of an inch on the right side.
Final Caulking of the Slider Frame
Now, you'd think this would be a simple five or ten minute caulk job. Guess again.

It took just a little under an hour. first they were cutting and shoving some Styrofoam into the gap and applying caulk, and more Styrofoam and more caulk. the more they worked with it, the rougher it got. I have to attribute it to them being tired at the end of the day. They had already done a professional caulk job on the inside of all the windows they installed.

Finally, it became smooth, and they were done. We were all pooped.

Be sure to tune in next time as we cover the exciting adventures of Joe the Electrician, pulling my finger wire and finding what an adventure it can be dealing with Polyducto and concrete.

30 May, 2010

It Must Be Therapy

The past week or so, I've been spending just about five hours a day in the pool. Maybe not at once but several times in a day. There have been times though, where it was a solid four hours. Today, we were in it most of the afternoon, while it was raining. Quite nice.

Let's see, where are we? Well, the guesthouse is almost completely painted - inside and out; we have the bathroom vanity, sink, and faucet installed, along with the tile back-splash; the toilet is in, although, it's plagued right now by a small leak that I'm trying to track down and solve; We had a couple of guys come by to measure, etc., for a bid for the kitchen cabinets and doors; and, we're supposed to get our louvers, sliding glass doors, and roll-up door installed tomorrow. That's about it. I've been busy, busy, busy. It seems when construction is underway, I make at least three trips to town for supplies, parts, you name it.

Speaking of the toilet, we've replaced everything that came with it. The toilet seat cover had an unfortunate accident.
I Think It's Busted
We started with the seat. Dianna was actually responsible for this. As the installation was proceeding, she wanted to check to see how 'un-wobbly' the toilet was after fastening the flange bolts, so she sat on the lid. Instantly - boom! We weren't real happy with it in the first place, kinda cheesy.

So, yesterday, I purchased a new filler valve and float. This morning, I got a new seat along with a new overflow/drain valve and new brass tank-to-bowl bolts and rubber washers. I also got a new connector hose as with the new filler valve, it naturally takes a different sized hose than the old one.

Now, the toilet has completely new innards - and we haven't even used it yet. That's not true. I pee'd in it this afternoon, after caulking the gaskets to try to stem the leak. I flushed and bingo! It still leaks. Dangit!
Dianna Supervising, Mayo Installing the Toilet
As far as the painting, all that's left is the bottom of each window louver, as the way they do it, is to install the louvers, then plaster up the bottom to fill in any remaining gaps. That's the part that still needs painting. And the roof - it still needs priming and an application of snow coat, almost like the stuff we would put on RV roofs. It's a rubberized product (quite expensive here) that once applied will lower the inside temp a concrete-roofed house by about ten degrees.

We're also ready for the electrician to come back and complete the wiring, including installing another whole house surge suppressor and possibly moving the pool's waterfall and in-pool light switches to be more convenient - like inside the utility room of the guesthouse.

Walkies have been fun. I wore out all of my Crocs, so I resorted to trying to wear my Kean sandals, which look cool, but I didn't find them comfortable before. Well, if I just wore them a little at a time to break them in, that probably would have been fine. Instead, I wore them for our usual walk - almost 4 miles. Here's the result:
Finally Down to 4 Bandages
Ow, ow, ow! That wasn't the brightest thing to do. After I got back, it's been bandages and immediately switching over to my sandals, that I haven't worn in over two years. (I haven't work the Keans in at least that, either). Good thing, cause we haven't been able to get over to Chetumal to Sam's Club to buy new Crocs. If it wasn't for the sandals and the Keans, I'd be barefoot. The doggies just would not understand me begging off from walkies simply because I had no shoes. After all, they go bare-footed every day and they don't complain.
Paloma Getting New Paint
Speaking of walkies, each day, we walk past the local 'boatyard', actually just a part of Miami Beach, downtown. I had shown a picture of Paloma shortly after she arrived onto the hard. Now here she is sporting a very nice new paint job. I'm just waiting now for them to put her name back on her bows. She's a very pretty boat as is.

Below, is another view of her from the stern. A lot of care and skill has gone into this paint job.
Paloma's Behind
And, speaking of painting, I know Vivien has been champing at the bit for some shots of the painting in progress. Here's a few glimpses. The color scheme inside is white, a very light blue (some folks think it's gray) and navy blue (azul de marina).
Malo Rolling on the Light Blue
Final Outside Colors - Blue and Terra Cotta
And, a shot of the outside final colors, blue and terra cotta. Tomorrow, I'll be taking more photos as the louvers, etc., are installed. I'll be able to show more of the colors. I don't seem to have any shots of the navy blue. There will be.

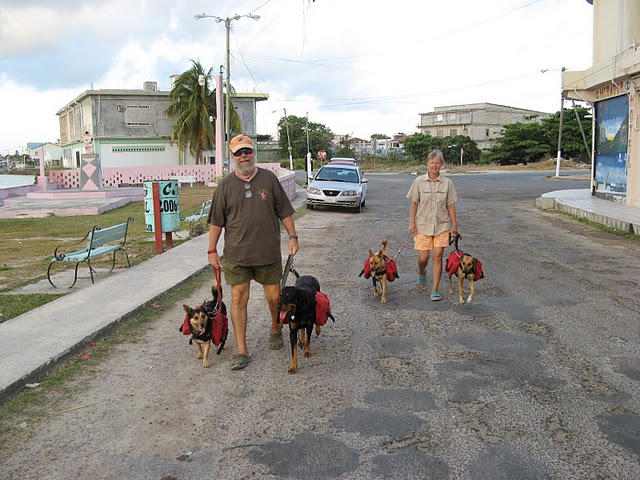
A while back, we had an acquaintance through the blog, Larry come to town. He came over to visit for a spell and the next day, Twyla and I ran into him during our walk. He was kind enough to send me a shot he took of us by the Mirador Hotel
Walkies - Courtesy of Larry O'Grady
He took a lot of photos around the area, many while he was looking at property. Here's a link to his Picasa photo album: (http://picasaweb.google.com/pollymop). Enjoy.

Well, that's about it for this evening. This is unusual. I normally do this about three or four in the morning. What happened? I'll take a bunch more and get something posted - soon. I promise!