Pages

Showing posts with label Louvers. Show all posts

27 January, 2016

Pool House Expansion Project, Day 90 - 25/01/16

Ceiling Fans and Other Stuff

Day Ninety, 25 January, 2016

Monday morning, right after I unlocked the gate for the workers, I remembered I hadn't taken any photos of our new shipment from Easy Shipping to Belize, LLC. After grabbing the camera, I headed into the new house to snap away. On the way, I took a shot of where the laundry piping still needed finishing in the office. It's coming along.
Washer Hookup Backside Being Filled
Then, I made my way into what will be the utility, laundry, pantry room and took a few shots of most of the boxes that came in on Saturday (I think). It consists mostly of ceiling fans, a large light for over the bathroom vanity, a whole-house water filter, and a no-salt needed water softener.
Christmas in January With Fans and Stuff 
On my way back to the Mennonite house, I snapped a shot of the new clotheslines that I put up in another part of the parking palapa. Thanks to Denis for his help in tensioning the lines. Definitely more than a one-man operation. You might be wondering why we have laundry hanging out at six in the morning. Well, humidity is such that it generally takes a couple of days to get clothes hanging on the line to dry. These are beginning day two.
New Laundry Lines Being Put to the Test
After that, as I was making my way back upstairs for breakfast, I noticed the sky. The usual great colors, so I snapped a shot. It's not bad, but I really was hoping it would turn into one of those 'Bob Ross' mornings, that happen very often down here. Not to be for this morning. Still, I'll take it.
Sunrise Over Casa Winjama
Our new windows arrived. Here they are stacked in the living room. These new ones have a lever system to open and close, much like the other louvers in the old part of the pool house, but there is a big difference. The new levers have a rachet-like feel as you open or close them. Also, when they're closed, the lever actually locks in place. A nice feature.
New Louvers Waiting for Install
The other part of the order was the sliding glass doors. Here they are getting untied. the two guys didn't waste any time getting all the parts into the house.
Sliding Glass Doors Still On Truck
And then they got right to work. Here they're assembling the frame.
Assembling the Frame
Upsidaisy, and quick as can be, the frame is up in the air and being gently nudged into position in the doorway.
Hoisting Her Up
Like this. It looks so easy, it could almost assemble itself.
In Position More or Less
I mentioned a little gentle nudging. Well, yes, with a hammer and a few well-placed soft taps with a rubber mallet, and it was in position.
A Little Tap Here, A Little Tap There
They worked well as a team. One guy grabbed the drill and began putting holes in the metal. The other one came by with a countersink on his drill and countersunk all the drill holes.
Drilling the Holes
Like he's doing here. Then the first guy comes in and drills a deep hole into the concrete. And finally, the other guy has switched tools and is using his drill to drive the blue screws into the concrete.
Countersinking Drill Holes
Dianna was getting excited just watching them work.
Dianna's Excited
As soon as all the drilling and screwdriving was done, then they began to hang the stationary windows.
Fitting In A Stationary Door
But, first this slight break. Here's the back porch or stoop, all cleaned up and ready for tiling.
Back Stoop Ready for Tiling
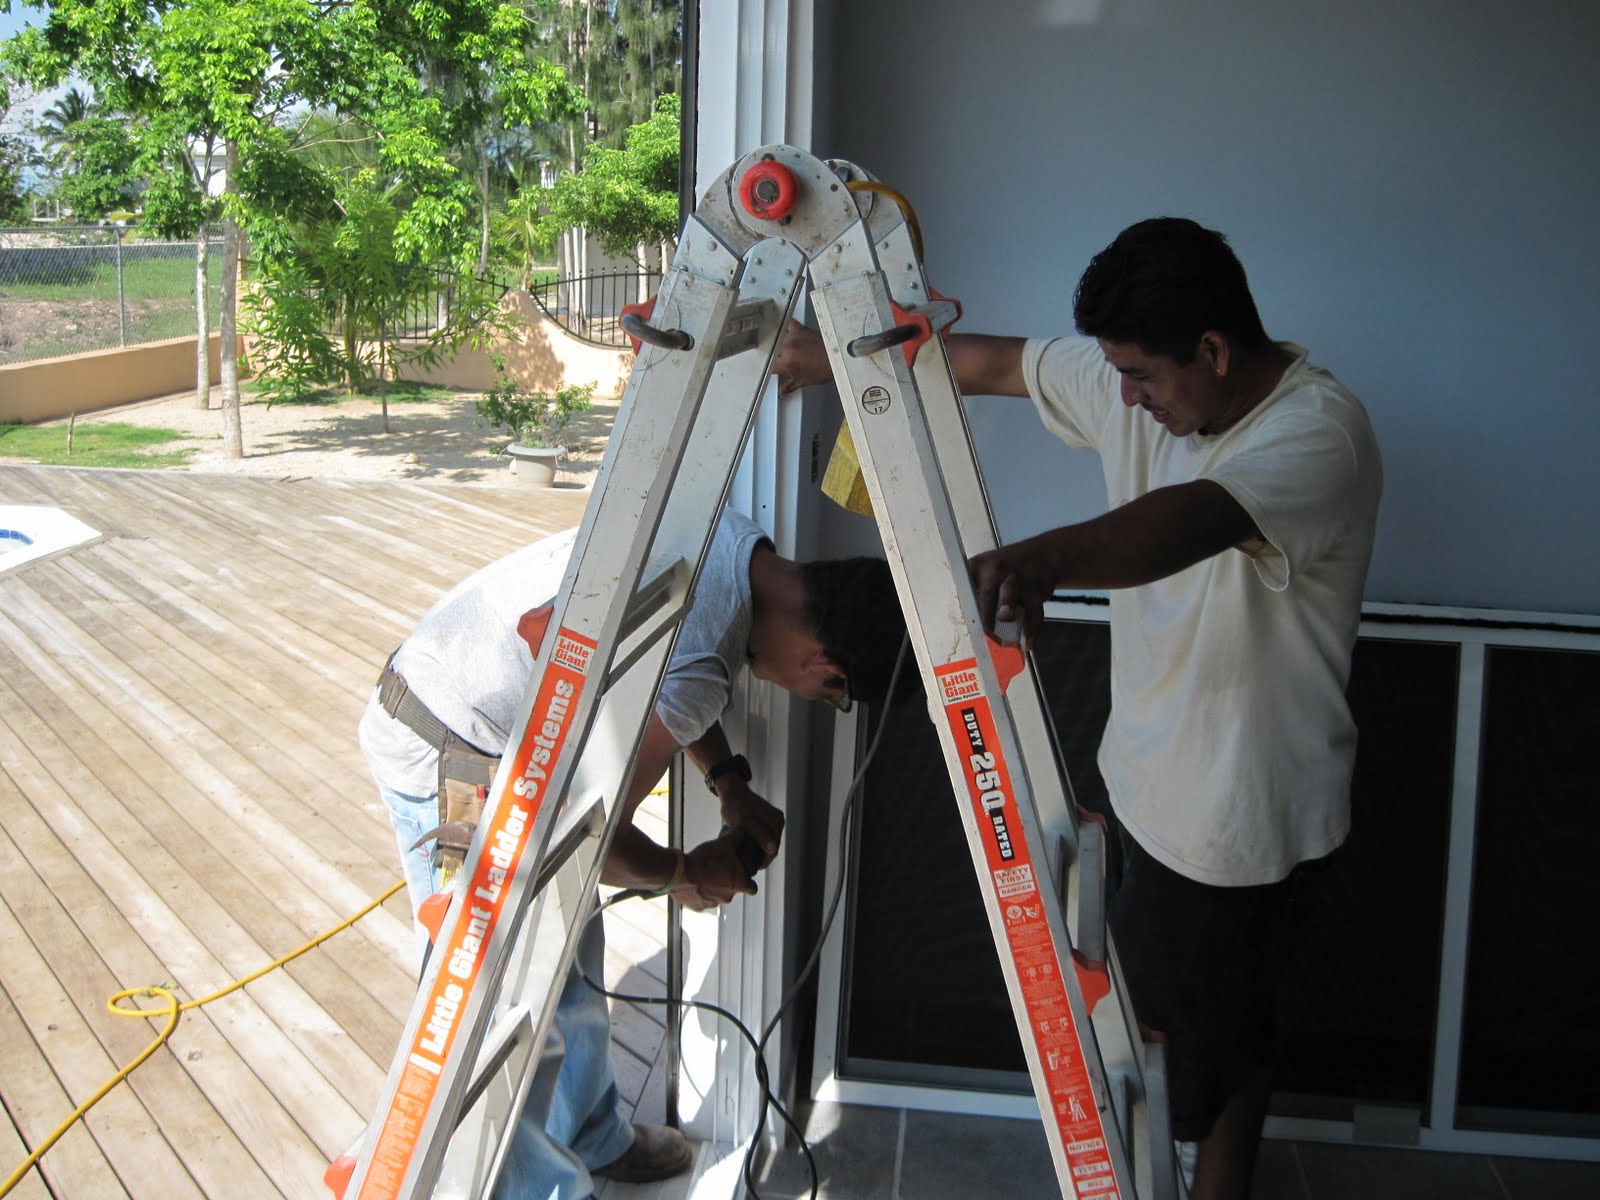
Lest I get too distracted here's the guys working on the doors. They were busy .lining them up, and screwing and pop-riveting them into position.
Looking Like Glass Doors
As here. Top and bottom, rivets are applied. The door is already changing the character of the room.
Riveting Them into Place
Then, a short break while they check to make sure that they actually do slide.
Looks Like They Slide
Looking past the worker, you can see that the view is quite nice and really doesn't appear inhibited at all.
Still A Nice panorama
Then come the screens and the sliding glass door is done.
Adding the Screens
But they're not, yet. There's louvers to hang as in the view below.
Installing the Louvers
Each louver is adjusted for height and side-to-side location.
Adjusting the Fit
A nice looking louver. If you notice the gap at the bottom, that's because we didn't size the opening to fit these particular louvers. About the only way we could have done that would have been to have a completed louver on hand so that we could refine measurements.
The View From Outside
And a louver closed. A nice, tight fit - well, it will be once that corner gets nudged into place.
Louvers Going In
Work on the bedroom louvers is moving right along. You might have noticed the gap at the bottom of the louver. That's not a defect, but, like I said earlier about knowing the size of the louvers, you tend to end up with some gaposis at the bottom of the opening which must be filled with concrete and then colored to match. A minor inconvenience, but a commonly found one.
Installing Another One
It looks nice with louvers running down the wall. Gives the place a finished look.
Louvers All The Way Down
Omar has been busy laying out tile on the back stoop. He'll begin using Thinset to permanently anchor them.
Back Stoop Tile Fitting
I started work on a project of my own. Since we got the water softener, I decided I'd take a whack at installing it myself. This also means installing the whole house filter as well. All that will start tomorrow.
Whole House Filter and Water Softener

There's many more photos than appear in each posting. You can see all the photos of the construction project on Flickr at: https://www.flickr.com/gp/winjama/0wVc3s. There will be new photos added each day of the project.        

05 June, 2010

Pulling Wire

Or, the Further Adventures of Electrician Man...

But, first we need to cover the rest of the window bit even though it occurred more or less simultaneously with pulling wires, etc.

As you no doubt have seen, after the windows were installed, many of the windows still had a bit of gaposis under the louvers. This is standard practice down here. I don't know if its because of different spacing between individual louvers or different mechanical functions in the way the louvers are actually opened or closed, or what. Anyway, the practice is to leave some gap at the bottom that, after installation, is then back-filled with mortar, finished and painted. So that's what's happening here.

In this photo, Mayo is tucking mortar into the gap under the window frame and smoothing it out. They even install a small wood form to square-up the front edge.
Mayo finishing the window bottom
As you can see from this next photo, Mayo has also placed a form inside so it gets finished on both sides and painted.
View From the Other Side
So, once the mortar work is done, then the raw mortar is primed and that is allowed to dry - which down here doesn't take long at all. Here, you can see Malo applying the terra cotta finish coat to the window. That's it - all done.
Finishing the Windows
At about this same time, I brought out the little air-conditioning units for the bedrooms. In this view, you can see one of the units already installed and Mayo re-sizing the other opening. This opening was made by a guy that worked for Isidoro for a couple of weeks. Even though the correct measurements were written on the wall for him to follow, one opening ended up right and the other ended up wrong. Go figure.
Fixing the A/C Opening
Each unit was fastened to the wall with L-brackets and TapCon screws, then spray foam shot around the inner edges, which was then trimmed and caulked, and finally painted, so from the inside, they look really finished and 'built-in'.
A/C in #2 Bedroom
------------------------------------
Ok, now to the adventures of Electrician Man.

One of the things about concrete houses that we were essentially unfamiliar with, is how wiring is run in a concrete house - well, at least how it's usually done here in Belize.
Joe Pulling Wire
To run wire, folks usually use a product called Polyducto as a kind of flexible conduit for the wiring. it's basically an orange-colored tube, about the consistency of a common garden hose and is sold in 50' rolls (maybe more).

The Polyducto is positioned within walls and floors and ceilings as the house is built up, which is fine as far as that goes. What is supposed to happen is that each end of the tubing is capped with tape to prevent concrete running into the tubing when the concrete floors or ceilings are poured. What can also happen, since the tubing is flexible, is that it can easily collapse under the weight of concrete - especially if someone steps on it during the concrete casting process.

In either case, the electrician then has to try to break through the concrete plug in the Polyducto, or to try and force wiring through a pinched bit of tubing.

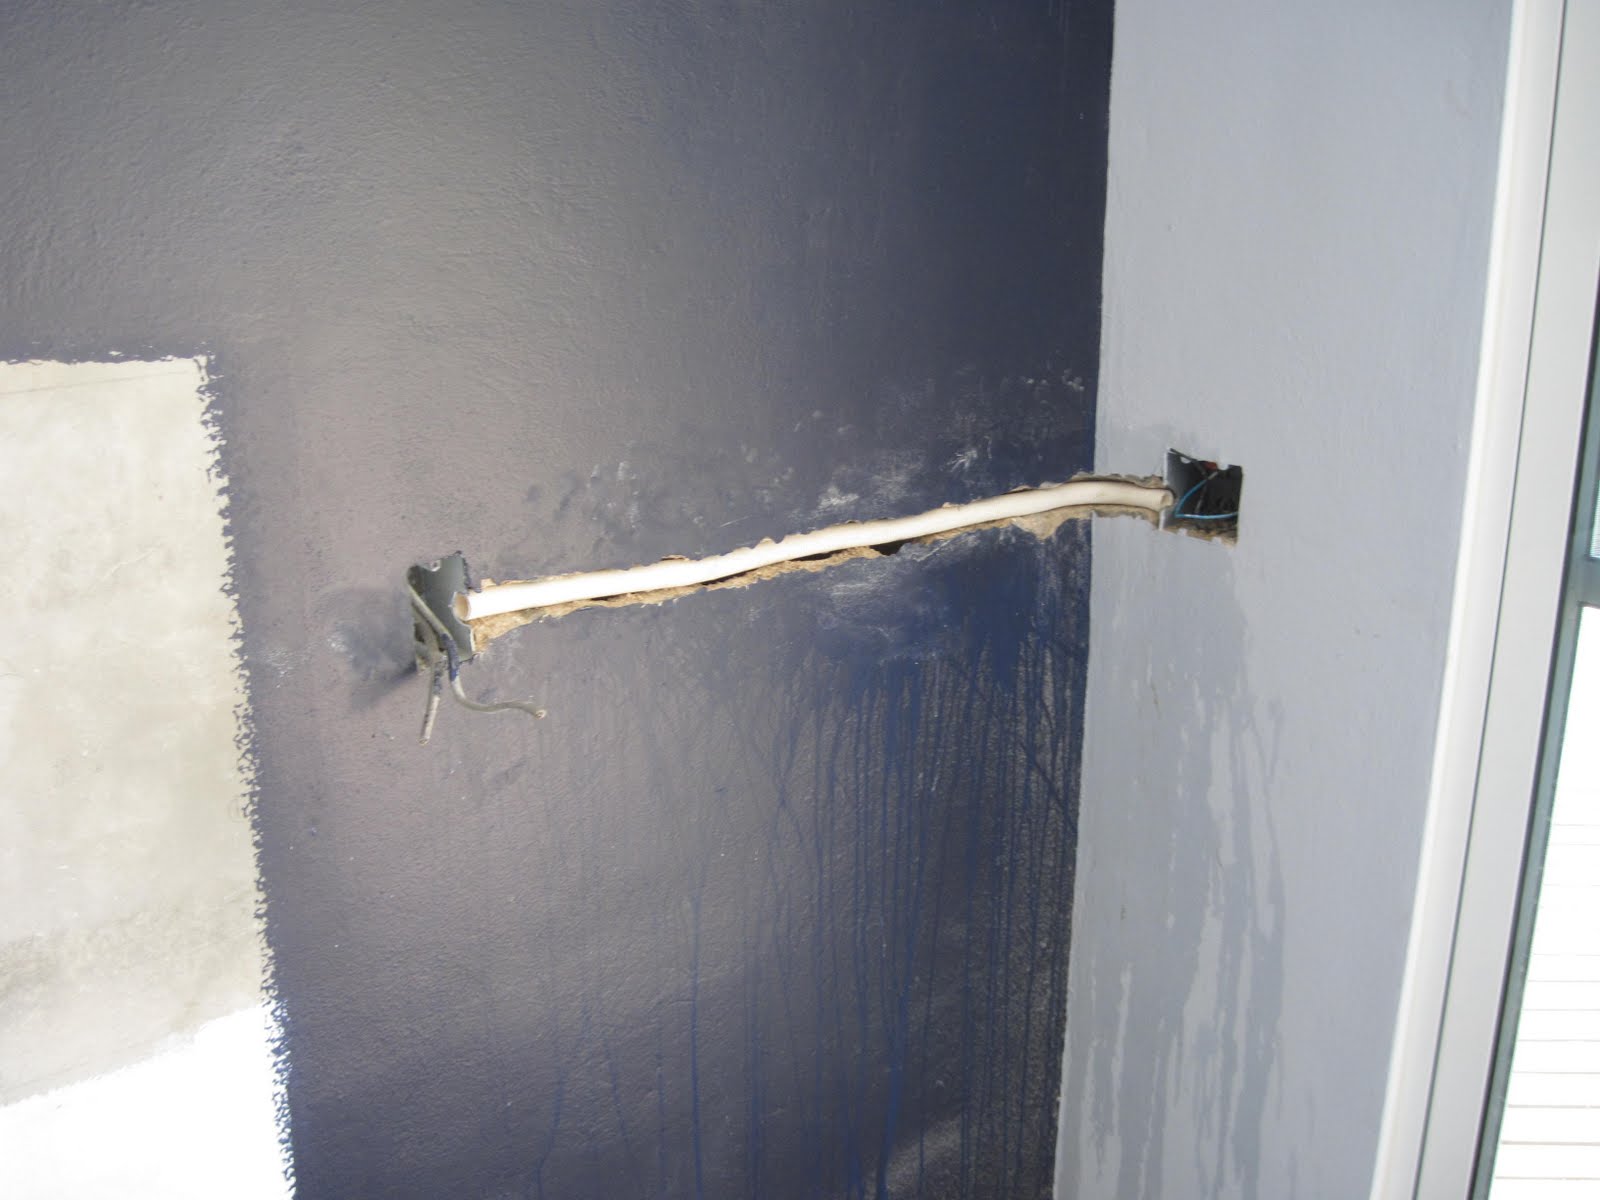
If they're unsuccessful doing that, then what has to happen is what we had to do. Channels have to be cut in the wall to run Polyducto or some similar product to allow circuits to be completed. In this example, Malo is cutting a channel from a working power circuit up to a switch that will control an outside motion-detector light.
Cutting a Channel
Running channels around corners presents other issues as well as the aforementioned kinking problem. Corners, like this that Mayo is cutting, below, frequently have concrete columns that were cast before the wall was built and are much harder to cut through and consequently, to run the wire.
Mayo Cutting A Corner Channel
Of course, this would all have been easier if there had been no paint on the wall. Hmmmm, I think there's a lesson in there somewhere.
Mayo Patching the Channel
We had to have the guys cut about six channels and in addition, they also had to run some surface wiring in places where cutting a channel was simply not practical.

Of course, each channel means it has have Polyducto added to it, then it is patched with concrete and smoothed out to be ready for painting.
Final Smoothing of the Mortar
In this example, we used some flexible tubing in order to make the tight corner bend. Polyducto would not have been good for this tight cornering.
Corner Bridged
Once you have it all smoothed and dried, then it's ready for priming and painting. Hopefully, you'll be able to match everything up properly and the cut won't be too noticable.
Ready to Go
------------------------------------
 One last item for now. I also got the on-demand water heater installed and hooked up. I don't, as yet, have a butane bottle for it, nor do I have a vent pipe for it nor a hole to vent the pipe out. That'll all come when it needs to. Showering right now, I don't know anyone here who uses hot water for showering at this time of year.
On-Demand Water Heater
Well, that's it for this issue of 'Electrician Man'. Stay tuned for more adventures as they come.

04 June, 2010

Every Day's a Big Day Tuesday

I started out to title this posting 'Big Day Tuesday'. I changed my mind. Events just move too fast. I'll see if I can get caught up here.

What better way to get started than having a nice comfortable throne? Here's a shot of our newly installed 'terlet' - fully functioning too.
The Throne
It does still have one tiny leak. The right-side bolt that holds the tank to the bowl still leaks. I haven't been able to entirely stop it yet. I'm looking for an easy solution, so far it's avoiding me.
Windows Arriving
And on Tuesday (the day that started this post), at about 9:30 AM, or so, Roger, from Capital Factory (http://www.capitalfactory.bz/) here in Corozal, showed up with his crew and a full load of louvered windows, sliding glass doors and a roll-up door. They wasted no time beginning the unloading process.
Windows Stacked Everywhere
And, as fast as the windows came in, here comes tromping up onto the deck, this huge contraption - our new 'roll-up' door.
Roll-up Arriving
Looking huge, as it arrived, and even larger after it got installed, the roll-up door is quite the piece of machinery.
Roll-up On Deck
Of course, what we were most excited about, and what the real purpose of the roll-up door is for, that's to protect the double sliding glass doors that are the next thing to be pulled out of the magician's hat, er, truck.
Screen Doors Waiting Their Turn
But, unless we get the louvered windows installed first, nothing else happens. So Roger took the bull by the horns, and started the installation process with the first louvers going into the bathroom. I swear it was already a little cooler just with him doing that.
First Window Being Installed
To be honest, while the windows were being installed, part of Roger's crew was working on getting ready to install the roll-up. Here, they're getting ready to drill for the mounting bolts.
Is This Thing Level?
And magically, the roll-up is up. Actually, it did go up rather fast. Unfortunately, the size of the box for the roll-up covered the boxes we had in place in the wall for a couple of lights, one on either side of the doorway. We'll have to figure some way to deal with that later on.
Roll-up Is Up!
Right after mounting the roller assembly, comes the motor. This is made by the same Chinese company that made our gate motor (Dongrong), which has be virtually trouble free in over two years of continuous operation.
Next Up - the Motor
After the motor, then comes the 'curtain' as it's called. The metal fabric that is actually the part of the assembly that goes up and down. I suspect it weighs a bit.
Roll-up Curtain Arrives
Next, they have to get the curtain up to the roller. A simple way is to rig a couple of rope slings to rest the curtain in as they spin it around to find the end piece that actually becomes attached to the roller.
Ready to Hoist the Curtain
That in turn gets fasted to the roller with one metal screw. That is, until they make sure the curtain is rolling square to the roller. And they can't determine that until they get the two guides temporarily installed on either side of the doorway. An involved process for sure.
The Turn of the Screw
Ok. So now, it looks pretty level. Just a bit more adjusting and it'll be ready to roll up as a roll-up should... or, something like that.
Making Sure It's Level
Here's a quick glimpse of what the roll-up looks like, at this stage, from the inside.
Pretty Solid
While all this work was taking place, there had to be some supervision. Here's Dianna and Cody checking progress from the shade of our little gumbo limbo tree by the canal.
Supervising's Hard Work
Here's the final assembly of the curtain - Lots of screws hold it to the roller.
Final Attachment
Just so you don't forget, there was a whole other group of worker-bees putting the window louvers into place at the same time the roll-up was being worked on.
Windows in Bedroom #1
Part of the installation process is making sure the window opening is sufficiently large to accommodate the louvers. Here, Roger is using a hatchet to trim off some concrete from the kitchen window. Some windows, like this, were almost a glove-tight fit. Others, had quite a large gap. You'll see how it gets filled in later on.
Roger Adjusting Kitchen Window Opening
As you can see, Roger is a man of many talents. Not only adusting window openings, but as you can see  below, pretty good at the assembly game as well. Here, he's getting the frame set up to be slid into place to hold the sliding glass doors.
Roger Assembling the Sliding Door Frame
Here's a shot of the crew installing the framework for the sliding glass doors.
Installing Slider Frame
Next up, once the frame is screwed into place is the installation of the sliding glass doors, and in this case, installation of the two outer non-slider glass doors.
 Sliding glass doors Arriving
In pretty short order, it begins to look a lot like sliding glass.
Couple of Glass Doors On Track
I took advantage of having the pool deck umbrella open to shoot this shot of the glass doors. Starting to look pretty good if I do say so myself.
All Four In Place
We wanted to have the roll-up look a little classy, so we order it to come with a cover. Here, they're hoisting it into place.
Roll-up Cover Going Into Place
In case I didn't mention it (I didn't), this turned out to be an all day evolution. Roger and his crew didn't leave until after 5:30 PM. They worked hard too.
Cover's Almost Done
One of the last things they had to install was the motor cover. As you can see, the wiring is not completed. As Roger said, "We leave that to the electrician." Good thing I have one on tap.
Installing the Motor Cover
At this time of the day, there's just a little left to do. Pick up the debris, tools, and all the bits and pieces that result from an installation.
Everything Is Just About Done
There's just one tiny little thing left to do. That's to caulk across the top to fill in the gaposis between the slider frame and the concrete of the doorway opening. It's uneven, naturally, about three-eighths of an inch on the left side, tapering down to less than an eighth of an inch on the right side.
Final Caulking of the Slider Frame
Now, you'd think this would be a simple five or ten minute caulk job. Guess again.

It took just a little under an hour. first they were cutting and shoving some Styrofoam into the gap and applying caulk, and more Styrofoam and more caulk. the more they worked with it, the rougher it got. I have to attribute it to them being tired at the end of the day. They had already done a professional caulk job on the inside of all the windows they installed.

Finally, it became smooth, and they were done. We were all pooped.

Be sure to tune in next time as we cover the exciting adventures of Joe the Electrician, pulling my finger wire and finding what an adventure it can be dealing with Polyducto and concrete.