And, as fast as the windows came in, here comes tromping up onto the deck, this huge contraption - our new 'roll-up' door.
Looking huge, as it arrived, and even larger after it got installed, the roll-up door is quite the piece of machinery.
 |
| Roll-up On Deck |
Of course, what we were most excited about, and what the real purpose of the roll-up door is for, that's to protect the double sliding glass doors that are the next thing to be pulled out of the
magician's hat, er, truck.
 |
| Screen Doors Waiting Their Turn |
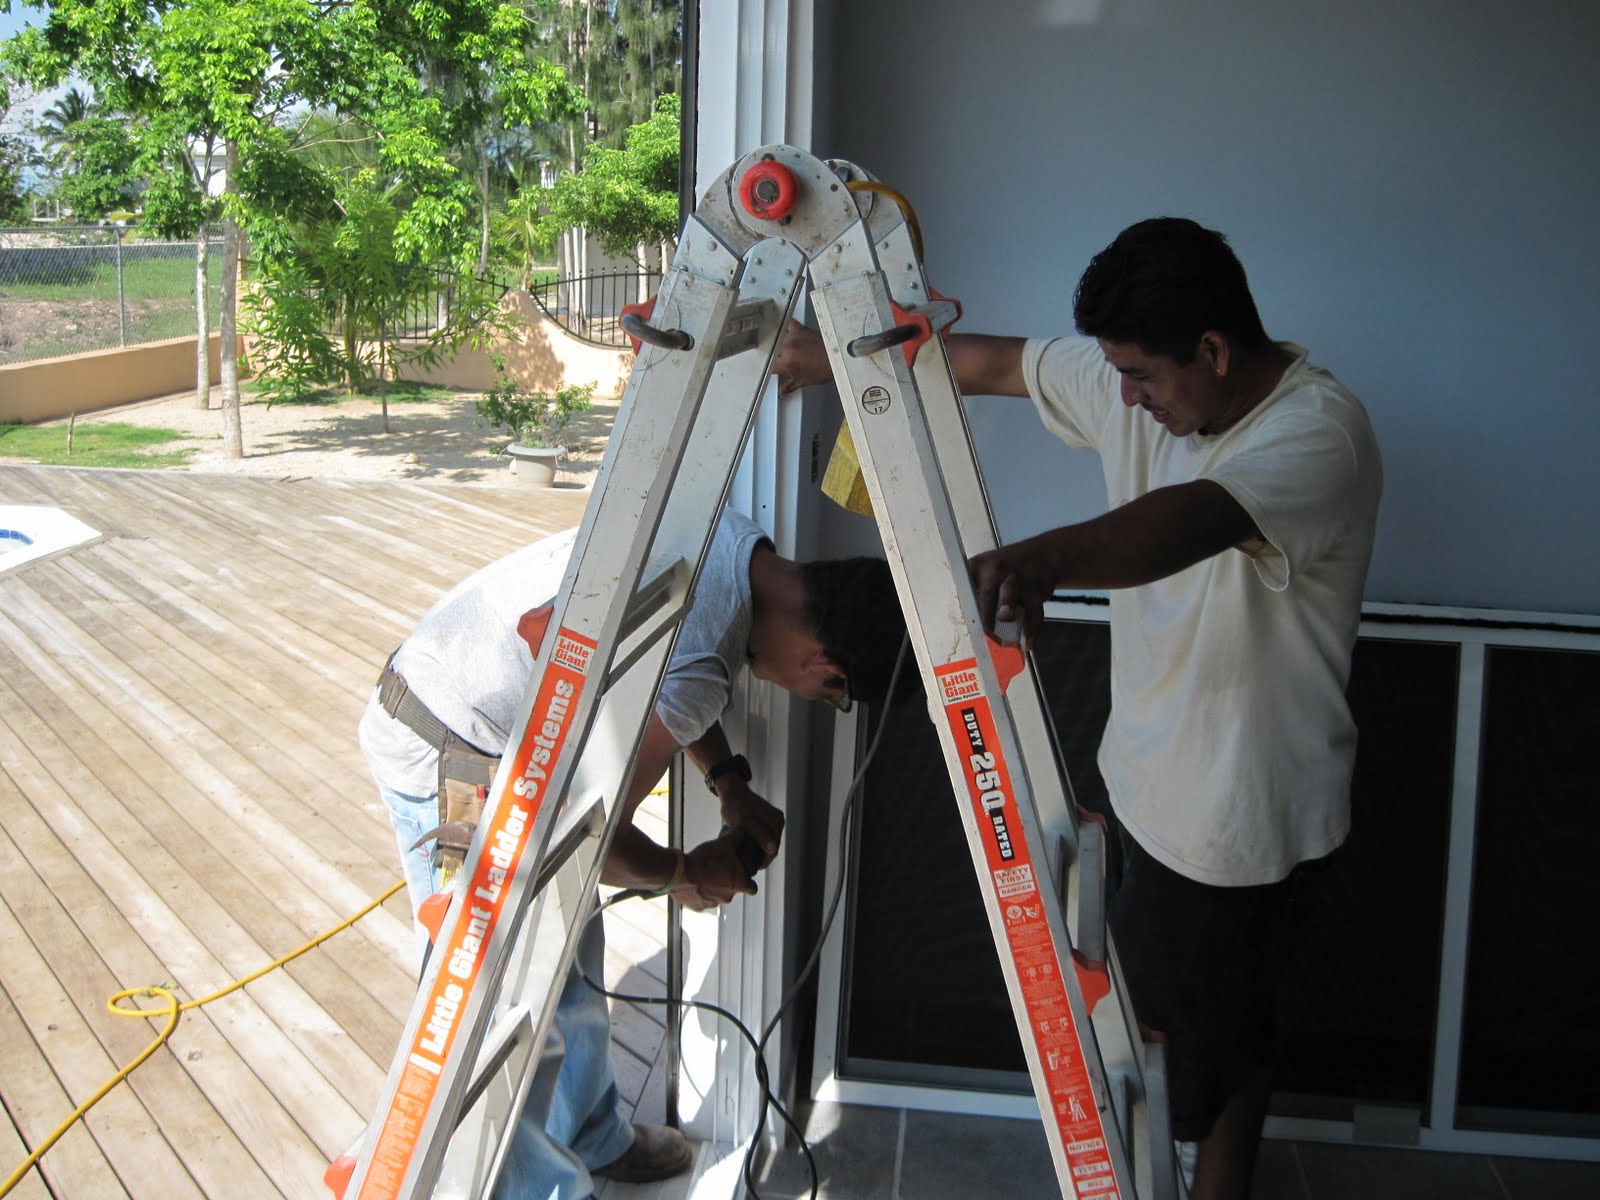
But, unless we get the louvered windows installed first, nothing else happens. So Roger took the bull by the horns, and started the installation process with the first louvers going into the bathroom. I swear it was already a little cooler just with him doing that.
 |
| First Window Being Installed |
To be honest, while the windows were being installed, part of Roger's crew was working on getting ready to install the roll-up. Here, they're getting ready to drill for the mounting bolts.
 |
Is This Thing Level?
|
And magically, the roll-up is up. Actually, it did go up rather fast. Unfortunately, the size of the box for the roll-up covered the boxes we had in place in the wall for a couple of lights, one on either side of the doorway. We'll have to figure some way to deal with that later on.
 |
| Roll-up Is Up! |
Right after mounting the roller assembly, comes the motor. This is made by the same Chinese company that made our gate motor (
Dongrong), which has be virtually trouble free in over two years of continuous operation.
 |
| Next Up - the Motor |
After the motor, then comes the '
curtain' as it's called. The metal fabric that is actually the part of the assembly that goes up and down. I suspect it weighs a bit.
 |
| Roll-up Curtain Arrives |
Next, they have to get the curtain up to the roller. A simple way is to rig a couple of rope slings to rest the curtain in as they spin it around to find the end piece that actually becomes attached to the roller.
 |
| Ready to Hoist the Curtain |
That in turn gets fasted to the roller with one metal screw. That is, until they make sure the curtain is rolling square to the roller. And they can't determine that until they get the two guides temporarily installed on either side of the doorway. An involved process for sure.
 |
| The Turn of the Screw |
Ok. So now, it looks pretty level. Just a bit more adjusting and it'll be ready to roll up as a roll-up should... or, something like that.
 |
| Making Sure It's Level |
Here's a quick glimpse of what the roll-up looks like, at this stage, from the inside.
 |
| Pretty Solid |
While all this work was taking place, there had to be some supervision. Here's Dianna and Cody checking progress from the shade of our little gumbo limbo tree by the canal.
 |
| Supervising's Hard Work |
Here's the final assembly of the curtain - Lots of screws hold it to the roller.
 |
| Final Attachment |
Just so you don't forget, there was a whole other group of worker-bees putting the window louvers into place at the same time the roll-up was being worked on.
 |
| Windows in Bedroom #1 |
Part of the installation process is making sure the window opening is sufficiently large to accommodate the louvers. Here, Roger is using a hatchet to trim off some concrete from the kitchen window. Some windows, like this, were almost a glove-tight fit. Others, had quite a large gap. You'll see how it gets filled in later on.
 |
| Roger Adjusting Kitchen Window Opening |
As you can see, Roger is a man of many talents. Not only adusting window openings, but as you can see below, pretty good at the assembly game as well. Here, he's getting the frame set up to be slid into place to hold the sliding glass doors.
 |
| Roger Assembling the Sliding Door Frame |
Here's a shot of the crew installing the framework for the sliding glass doors.
 |
| Installing Slider Frame |
Next up, once the frame is screwed into place is the installation of the sliding glass doors, and in this case, installation of the two outer non-slider glass doors.
 |
| Sliding glass doors Arriving |
In pretty short order, it begins to look a lot like sliding glass.
 |
Couple of Glass Doors On Track
|
I took advantage of having the pool deck umbrella open to shoot this shot of the glass doors. Starting to look pretty good if I do say so myself.
 |
| All Four In Place |
We wanted to have the roll-up look a little classy, so we order it to come with a cover. Here, they're hoisting it into place.
 |
| Roll-up Cover Going Into Place |
In case I didn't mention it (I didn't), this turned out to be an all day evolution. Roger and his crew didn't leave until after 5:30 PM. They worked hard too.
 |
| Cover's Almost Done |
One of the last things they had to install was the motor cover. As you can see, the wiring is not completed. As Roger said, "We leave that to the electrician." Good thing I have one on tap.
 |
| Installing the Motor Cover |
At this time of the day, there's just a little left to do. Pick up the debris, tools, and all the bits and pieces that result from an installation.
 |
| Everything Is Just About Done |
There's just one tiny little thing left to do. That's to caulk across the top to fill in the gaposis between the slider frame and the concrete of the doorway opening. It's uneven, naturally, about three-eighths of an inch on the left side, tapering down to less than an eighth of an inch on the right side.
 |
| Final Caulking of the Slider Frame |
Now, you'd think this would be a simple five or ten minute caulk job. Guess again.
It took just a little under an hour. first they were cutting and shoving some Styrofoam into the gap and applying caulk, and more Styrofoam and more caulk. the more they worked with it, the rougher it got. I have to attribute it to them being tired at the end of the day. They had already done a professional caulk job on the inside of all the windows they installed.
Finally, it became smooth, and they were done. We were all pooped.
Be sure to tune in next time as we cover the exciting adventures of Joe the Electrician, pulling my finger wire and finding what an adventure it can be dealing with Polyducto and concrete.


2 comments:
Looks great with the glass in.
Viv
Looks great! There does need to be a magazine rack next to the toilet though - and good reading light. Hey, they don't call that room a 'library' for nuthin'!
Good looking rolldown door you have there and living in South Florida I know the value of good hurricane protection for windows and doors.
Great job!
Post a Comment