Pages

Showing posts with label Gable End Wood. Show all posts

22 December, 2015

Pool House Expansion Project, Days 65 and 66 - 21 - 22/12/15

Gutters, Ceilings, and Signs

Days Sixty-Five and Sixty-Six , 21-22 December, 2015

Compared to to a few days ago, this wall is looking particularly striking. All that remains is for them to finish the laundry pipes in the lower left corner. This is in the office and is the former outside wall of the bedroom, now to be a utility room.
Uility Room Wall From Office Almost Finished 22 - 7.00
This is the wall of the other bedroom, that we used as a sitting room. The unplastered part below is soon to be knocked out. Once that happens, things will really seem different, and it will definitely begin to merge the two structures.
Dining Room Wall From Living Room Almost Knocked Out 22 - 7.01
These are most of the down pipes for the gutter drains. They're in the process of being painted before being reinstalled. We sure could have used these a couple of days ago. We had on the order of five or six inches of rain in an afternoon. Without the down pipes being hooked up, the gutters and the flat roof just dumped water right down and it flowed over into the parking area. Luckily the rain was spread out for the afternoon, so a lot of it managed to be captured by our three floor drains that are in the parking area. But, if it had come down suddenly, the parking area would have been bursting at the seams.
Gutter Downpipes Almost Ready to Re-hang 22 - 7.01
One of Dianna's favorite bits, a niche in the shower wall. It'll be tiled and should really finish off the shower.
Shower Niche Almost done 22 - 7.01
The canal-side gutter drain is almost ready to have all its bits assembled and the top drain mortared in place.
Canal-Side Downpipe Needs finishing 22 - 7.02
We're getting quite a pile of debris to deal with. I'm not sure how we're going to deal with it. Might burn it early in the morning down by the second road gate, if there's no wind. If we can't do that, then we're looking at probably having to hire somebody to haul it off to the dump.
Big Pile of Debris 22 - 7.03
I almost missed this at first (hint: Always look up). Furring strips for the PlyCem out on the walkway and veranda, and greenboard drywall (moisture resistant) elsewhere in the house.
Furring Strips For PlyCem Being Installed 22 - 7.03
Here's more mahogany trim. I'm not sure where this will be installed.
Wood Trim Being Varnished 22 - 7.03
More furring strips going up on the other side.
Furring Strips on Other Side 22 - 7.04
Detail work of the furring strips showing corners that still need more to be done.
Needs an Edge 22 - 7.04
I took a short break and just stood there gazing at the canal.
Placid View of the Canal 22 - 7.04
Drain holes from the old roof drains have been plugged.
Old Downpipe Hole Patched 22 - 7.05

But Everyone Knew Her As Nancy...

This is our new road sign. No idea who put it up. Sometimes it points in the right direction (like now), other times it points the oposite direction, and sometimes, it points over toward Bay Shore Drive.

Ferry Road really isn't the correct name, at least according to the Corozal Town Board, when I paid our property taxes a couple of years ago, they informed me that the proper name was 'A' Street, South. Hmmm.

Of course, if you look on Google Earth, they call it the 'Corozal - Sarteneja Road.'
High Class Road Sign
But then, no one calls Bay Shore Drive - Bay Shore Drive. Everyone calls it Gringo Lane.

Another trip out for inspection, and this gutter to drain assembly is virtually done. A bit of paint here and there and check it off the list.
One Gutter Connected to the Drainpipe 22 - 11.03
This is the other end of it. It connects to a pipe that runs under the foundation, and ties in with the other side, and discharges into the canal.
There's Where It Enters the Main Drain 22 - 11.03
The guys are working to get the drain on the other side connected. This is great as it's apparent we're still going to be getting rain. So much for the dry season.
Connecting the Next Gutter to it's Drainpipe 22 - 11.04
The final touch is the new holes they had to bore through the old roof to connect the downpipes. This one is done. It has a plug in the center just until the mortar stiffens enough to keep its shape.
New Drain Motared in With Temp Plug 22 - 11.05
Here they're boring into the concrete to attach the metal straps holding the pipes up.
Drilling Holes for Brackets 22 11.06
This vew shows the wood gable is completed and really looks nice. The screen has the new black nylong fabric instead of the wrinkly metal.
Wood Finally Finished on Gable 22 11.06
Most of the PVC piping around the house has been painted. Not only makes it less of a standout, but paint actually protects the PVC from harmful UV rays from the sun.
Drainpipes by Rotoplas Received Paint 22 - 11.11
There's many more photos than appear in each posting. You can see all the photos of the construction project on Flickr at: https://www.flickr.com/gp/winjama/0wVc3s. There will be new photos added each day of the project.    

15 December, 2015

Pool House Expansion Project, Day 57 - 60 - 11-15/12/15

Working on the pocket doors.

Day Fifty-Seven - Sixty, 11 - 15 December, 2015

No photos on Friday, the 11th.

For the 12th, Saturday, we have a few. The pocket doors have been framed out for a few days. Now they're actually being fitted and finished. While they were installing the doors, they took off one side of the frame on each door to ease working on the door and the track.
Bedroom Pocket Door Hung
The frames, all home-built, were already quite strong. Omar wanted to add brackets to them to make them even stronger and more rigid.
Adding Strengthening Brackets to Pocket Door Frame
Of course, each of the brackets had to be individually trimmed to fit, so it's even more a custom installation.

Marking Brackets For Trimming
While work on the pocket door has been going on, work on finishing the gable ends has as well. Below, they have about one more piece to install, some final varnishing and the south gable end willl be completed.
Adding Last Pieces to South Gable
On the north gable, it's a little more complicated because of the join with the original pool house roof and transition with the new part. There's also a bit more caulking that will have to occur near the bottom to ensure no water infiltration.
North Gable Almost Done
Monday brought mor work on the gable ends, and that means cutting siding to size on the fly. Here they're doing just that.
Trimming Gable Siding
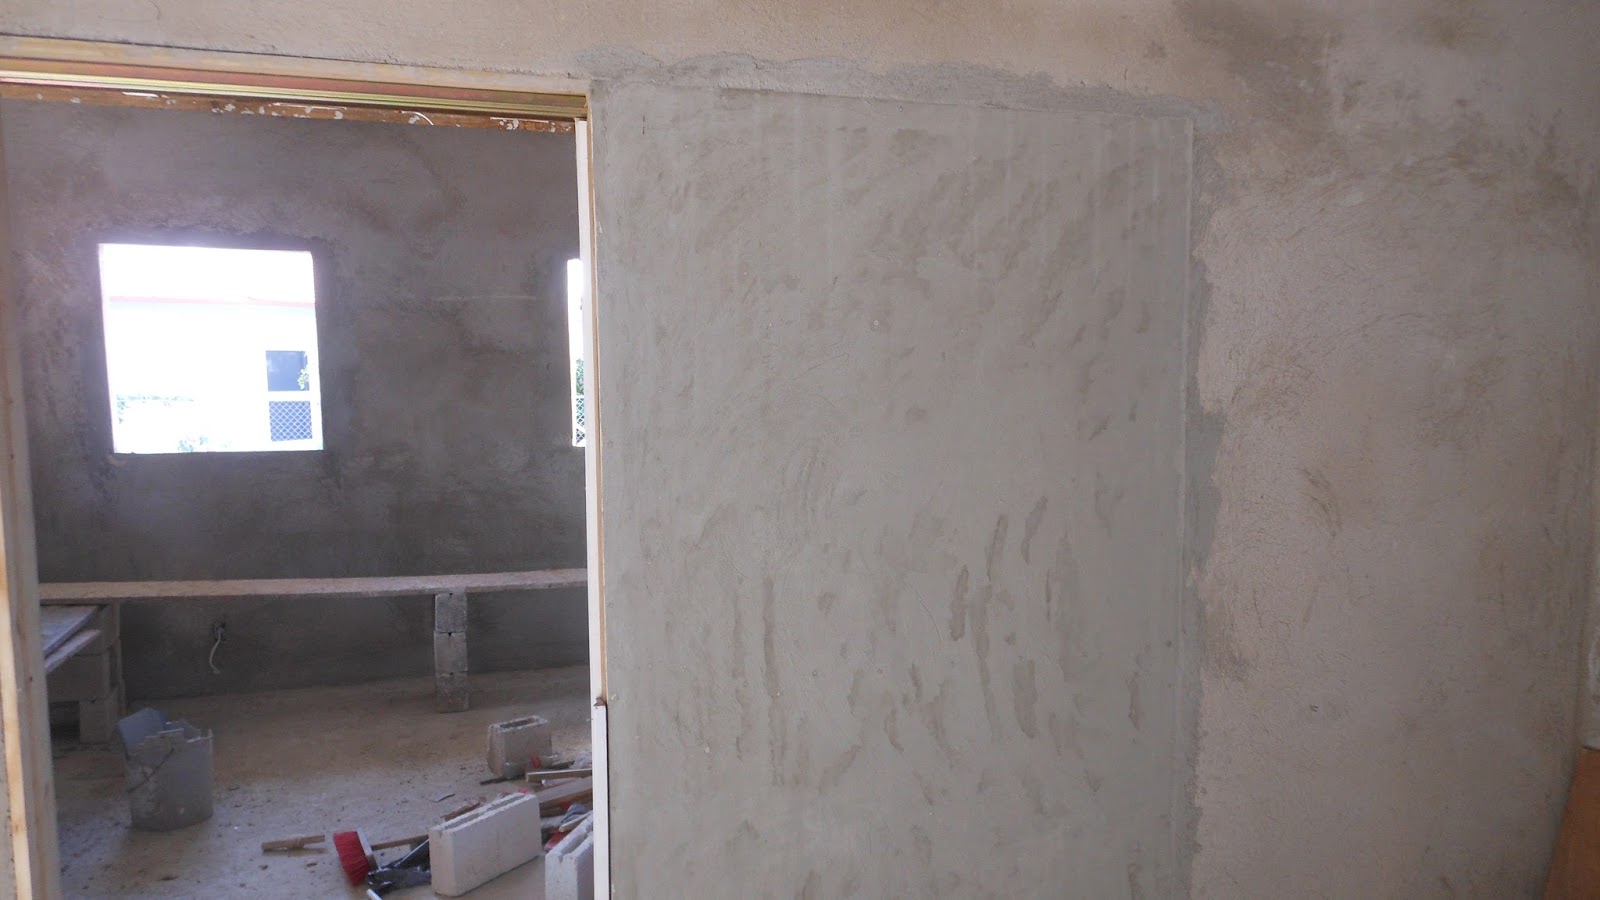
Here's the bedroom pocket door inside its frame. the PlyCem, or cement board simply is cut to size and screwed to the frame.
Bathroom Pocket Door Hung
As in the photo below. Once that's all done, then comes the initial texture plastering of the whole wall, which should really hide the fact that there's a pocket door there.
Bedroom Pocket Door With PlyCem Attached
From the living room side, you can see the PlyCem already fastened to the pocket coor frame.
Living Room Side of Pocket Door
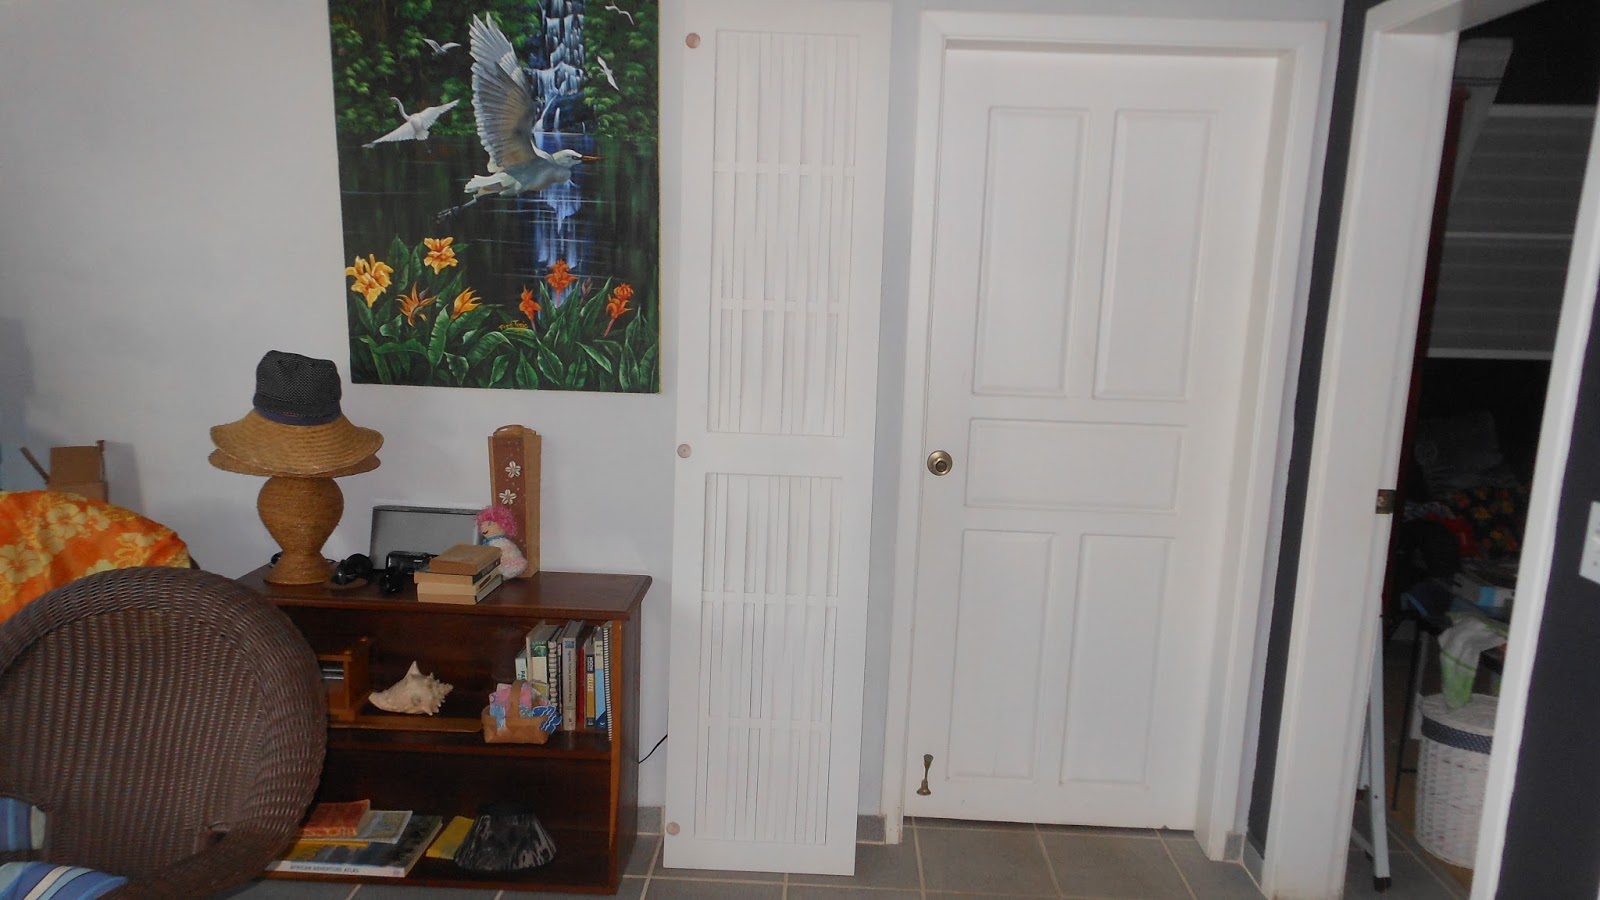
So you get the idea, here's the bedroom pocket door closed, giving you the idea of what it will look like in its finished state.
From the Bedroom Side
And the same thing from the living room side. There will be wood finishing trim added at the top to hide the rail at top and to finish the surface where the door disappears inside.
How It Looks With Door Closed
This has turned out to be a nice looking gable end. The two coats of Helmsman Spar Varnish, a durable, UV-resistant varnish, means it will last all of a year or two before it has to be done again. We've found that for the first year, getting a full year out of the initial application of varnish is a good thing. It really doesn't pay to go cheap in this regard. The cheaper stuff just won't last.
South Gable Done Except Screen
The north gable end is more complicated. As you can see below, there's still pieces of the siding that have to be applied, along with caulking to prevent water infiltration. We'll also have to re-apply some rubberized waterproofing to the row of blocks to prevent seepage. And of course, screening is yet to be applied at either end.
North Gable Still in Progress
Tuesdaymorning was a surprise to me when I looked in the house. I hadn't realized that the guys had applied an initial coat of plaster to the PlyCem on Monday. It looks pretty cool.
Bedroom Pocket Door Near Completion
Here's the view looking toward the bathroom pocket door.
Bathroom Pocket Door Near Completion
Now, They're plastering the bedroom and probably the reverse side of the bathroom pocket door and the living room side of the bedroom door. That part always seems to move fast.
Reverse Side of Bedroom Pocket Door
Yesterday, I spent a fair amount of time online looking at ceiling fans and bathroom lights. We've had pretty good luck ordering things from Lowes, and that continues. as the photo below shows.

We ordered three of the double fan on top of the photo. One will be in the living room, the next in the bedroom, and the last on the veranda as part of the living room. Combined, it has a seventy-four inch coverage. Pretty good. I've also ordered twelve-inch downrods for each of the ceiling fans as the four-inch ones that are included are simply inadequate.

The middle fan will be used in the office and in the bathroom. It has a fifty-four inch coverage, so we aren't messing around with tiny little fans here. Air movement is key to comfort.

And since we're going to have an eight-foot vanity in the bathroom, we decided to order a large seven light fixture to go above the vanity, as shown in the bottom of the photo.
Fans and Lights
After lunch, I snuck into the construction zone and captured these images of smooth plastering in the bedroom.
Smooth All the Way Around
You can still tell where the pocket door framing is because of different drying rates from the PlyCem to the concrete block. I'll bet by morning, there's no difference.
Smooth Plaster Applied
Final bit of touching up here and there, along with a little cleanup, and the room will probably be ready for the color coat tomorrow.
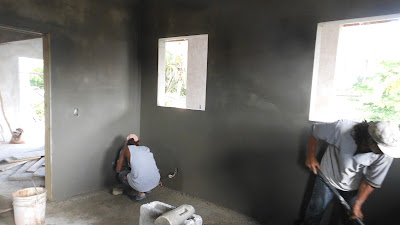
Finishing Smooth Plaster
Late this afternoon, Mitch showed up with the closet doors. Here they're bringing them in. We're running out of storage room .
Bringing In Clost Doors
The upper part of the closet gets a set of doors as well.
One of the Upper Closet Doors

Here's the inside of one of the main closet doors. The holes are for the hidden hinges that will be applied.
Closet Door Inside
Here's the other door facing right side out.
Second Closet Door Outside

There's many more photos than appear in each posting. You can see all the photos of the construction project on Flickr at: https://www.flickr.com/gp/winjama/0wVc3s. There will be new photos added each day of the project.   

25 November, 2015

Pool House Expansion Project, Day Forty-One through Forty-Five 20 -25/11/15

PC brought things to a halt.

Day Forty-One - Forty-Five, 20 - 25 November, 2015

For a while, I was cooking right along with daily postings that allowed everyone to easily keep up with the construction project. Well, all that ground to a halt here a few days ago. My PC went on the fritz again.

Actually what happened is that the PC got lonely for Fred's (Fred Orio) shop, Corozal Virual Office, and more than likely, his office kitty, Cauliflower. Anyway, there's a problem, possibly with the new motherboard. It starts to boot up and dies.

At least Fred is getting the PC to do the same thing it started doing with me. That's a good thing. I have high hopes that Fred will be able to fix it soon. 

What I'm using to post now is a program for the iPad, that allows me to post directly to the blog. Text works fine. Where it stumbles is adding pictures to the mix. And I've been using a lot of pictures. They're just going to have to wait for the PC's return before photos reappear.

I think when I left off, there was still a bit of roofing zinc that needed to be applied. That has been done now, and it looks really good.
Omar Measuring Roofing Panel Spacing
Other work that has been going on, is finishing the woodwork on the gable ends. There were pieces of the shiplap siding that had to be removed to hoist the gable end trusses into place, and there were pieces that hadn't been installed for various reasons, like on the north side, the part that contacts the original pool house, had to be shortened in order to fit the existing roof structure of that part of the pool house.
Working On the Eve Extensions
I was lucky to be stepping outside with my camera just as the crew was hoisting the first piece of zinc up to the roof. It looks simple enough, till you realize it weighs about 70 or so pounds, and the angle it's at, one slip, and it quickly becomes a guillotine.
First Panel Going Up
Now, they've got some screws in to hold it in place. From here on out, the roofing will move fast.
First Panel More or less In Place
Saturday dawned grey and cool. Kind of a lousy day for doing much you'd think, but you'd be wrong.
Ridge Cap Is Nearly Done
The crew was just about finished with the roof, applying the ridge cap and finishing up some details on the ends. But that only went so far. They were short a length of flashing to be able to finish up the north gable end. There were some other details that combined were going to delay finishing the roof till Monday.

But the weather and not finishing the roof only gave impetus to them working diligently down below on the walls, putting more of first coat of plaster on. I got sidetracked doing other things and didn't get any photos of the afternoon's work on the walls.
And Another One Does Up
Here's a shot of the underside of the roof. Beginning to look like it all makes sense now.
Looking At Roof From the Underside
Fitting the Inside Foam
Ridge Cap Nearly Done
Looks Like A Real Roof
The only question is on the ridge cap ends, there isn't an insert that blocks that hole that is available. We're thinking of using a quick shot of expanding foam to do that, but are reluctant to do that, because of the danger of shooting the least bit too much can cause more problems than too little.

A late breaking note on the ridge cap ends. I found a YouTube video (https://www.youtube.com/watch?v=KX76_eaW7ag) that shows a cool way to finish the ends so that they're secure and you don't have to shoot any expanding foam inside., Maybe just stuff in a hunk of foam rubber or something to help the end to stay in position. Anyway, I thought it was a nice solution.

There's additional ship-lap siding that will be added so that cosmetically, both ends look the same. Then varnish will be applied, and screen material added to the louver windows.


Another Piece is On the Way


Inching It's Way Up the Roof


Magically Up On the Roof
Twisting And Turning It'll Get There
Final Adjustment Before Screwing It
The other work that has been going on is parging or plastering the block walls. That really cleans up the way the house looks. They're going to do a rough texture on the bottom foundation part to match the rough texture of the existing pool house, then they'll do a smooth texture on the upper surface of the exterior walls.
Preparing Corners For Plastering
Rigging Stand For Plastering
West Side First Plaster Is Don
George and Errol are hard at work on the east side. Their stand is almost not high enough.
George and Errol Plastering East Side

This is over on the west side. The stand is almost too high. This is over on the west side. The stand is almost too high.
First Plaster Applied to Walls
It's fun to watch the guys apply the plaster on the first coat. It's all in the wrist as far as the technique of slinging the soupy concrete mortar mix from their trowels onto the walls.
Errol Slinging An Expert Trowel
There was a little break in the action, so to speak. No pun intended. But, there was a crack in the pool. This wasn't the first one we've had, and it probably won't be the last. Carlos and I are getting proficient at repairing them. All it takes, really, is some elbot grease, hydraulic cement, and some Diamond Brite to finish it off
Pool Crack Soon To Be Fixed
Here's a view from the topside looking down. As you can see, at this point, it's been a few days since Huey's been running and keeping the pool bottom clean.
Top Of Crack
That pool fixing stuff was going on at the same time as the on-going work of the house. Below you can see what happens when a concrete form relaxes a bit and allows the concret to slump out of position. After it cures, someone (in this case, George) has to come along and chisel it true again. A minor inconvenience.
Fair Amount of Chipping Required
Here's a couple of samples to give you an idea of what the texturing will be like. For the Veranda and walkways, the walls and ceilings will be done in a slightly rough texture, and will be in a light tan color.
Concrete Texture Samples
The exterior walls, the lower part will be done in teracotta to match the existing pool house, and the upper part will be the same except for the corners, will be blue columns at on the original. We'll also be making liberal use of stone dust for texture.
Concrete Color Samples
Dianna has gotten into the act, doing a bit of additional mixing to help get the color the way she wants it.
Dianna Getting Into It
It's getting closer now. Still has a way to go. It's a lot like mixing paint, except you're using concrete mortar.
Dianna Describing What She Wants
And now, back to the pool. Carlos is using my air chisel, which really speeds up removing concrete that has failed for some reason or other. Right here, he's taking care of a surface crack that is only in the Diamond Brite on the pool bottom.
Air-Chiseling the Bottom Part of the Crack
As you can see up the pool wall, it's a pretty good-sized crack. You can't let that intimidate you. It's no where near as bad as it looks.
Big Crack
Of course, keeping things clean is a big part of the repair process. Here Carlos is sweeping up a bunch of small chips, etc.
Carlos Cleaning Up
A big help in cleaning the crack was to use the air-blower of the compressor. A lot of dust and small chips were still hiding inside even after we thought things wer pretty clean.
Cleaning Out the Depths
Once, it's all nice and clean, then it's time for the hydraulic cement. This stuff is expensive (it comes in a 5-lb box and costs around $25.00 BZD. The really important part about it though, is the working time - that's only on the order of five minutes, so you have to work quick, and be thorough. There's not much time for a second chance.
Carlos Patching Using Hydraulic Cement
Now that the crack is finished, all that is needed is a nice coat of Diamond Brite.
Big Part Don Except Diamond Brite
As you can see Carlos applying below. it doesn't have to be thick, but it should be applied in a fairly even coating.
Carlos Diamond Briting the Patch
Finally, I've reached the end of this posting. Stay tuned. More to com.

Cheers
Dave

There's many more photos than appear in each posting. You can see all the photos of the construction project on Flickr at: https://www.flickr.com/gp/winjama/0wVc3s. There will be new photos added each day of the project.