Pages

Showing posts with label Concrete Patching. Show all posts

07 December, 2016

Monday and Tuesday

This covers Monday, 05 December, and Tuesday, 06 December, 2016.

We have now officially got two separate metered circuits here at Casa Winjama. One is for the Mennonite house upstairs and the downstairs laundry room. All the rest of the downstairs, gate, well house, and everything else, is on the other circuit. We're inching forward one step at a time.

One of the benefits of becoming an old fart here in Belize, is that once you become 65 and get a Golden Citizen Social Security card, there's actually two things that can happen.

One, you're able to get on the list for a ten-percent reduction in your electric bill for a year. It's a lottery thing and there's only so many slots per year for that. We're on the list for next year. I'm hoping our chances to win that are zero. I'm sure there's many more deserving people who could really benefit from a reduction in their electric bills.

Two, if you want to get a second electric meter for whatever reason, then thanks to the Golden Citizen card, there is no fee for the new meter. We definitely took advantage of that.

Back Corner Fence Repair
The back fence rebuild is almost done. It's really looking good.


Almost All Done
The steel is back in place, the mound of dirt has been smoothed out and several plants that I thought had bought the farm, look like they're thriving. Good for them.


Looks Good From the Dock
From the outside on the dock, the rebuild looks very good.


Flawless, Complete With Autograph
The rather large hole that had been cut in the dock to ensure drainage all the way to the canal has been almost seamlessly patched. You'll notice that somehow, unbeknownst to me, some doggy managed to autograph the patch. I have no idea how that happened. Dianna wondered if a dog that she saw back there one day, had been the guilty party. That might be right.


The Other Corner Got Done Too
The other corner of the back fence, although I hadn't asked them to fix that (cost savings, you know), was more than adequately repaired the the guys. They had some left over concrete and went ahead and did it. So the whole back dockside looks good. All that has to happen now, is to bring Cody, our retired caretaker back on for a couple of days to paint the fence, then all will be ship-shape.


Panels Galore
Getting the circuits separated required another 16-breaker panel. So, that is what we have now. The upper and lower panels in the middle, are, as you might expect, upstairs circuit and downstairs circuit.  The box to the right is the generator transfer switch which for right now only takes care of the Mennonite house. The small box to the left is the whole house surge suppressor that takes care of both upstairs and downstairs. We also have a second whole house surge suppressor in the pool house utility room

Upstairs Panel
The upstairs panel. The chart to the left needs to be redone. It's a guide for activating the generator and the order to turn on breakers when on generator power.


Downstairs Panel
Here's the downstairs breaker box. Rather simple. I still need to get with Bani and have him go over all the breakers with me so I can create updated charts for both boxes.


Concreting By the Hose
Endher created a small ramp for Dianna around back coming from the patio to the door that goes into the veranda.


Looking Down From the Deck
The guys also concreted the area right around the hose faucet to minimize chances of mud. The pipe sticking up will be a small floor drain once it's trimmed down.


The West Ramp
At the other end of the deck, Endher created another small ramp so that Dianna has a smooth transition to the parking area. Both this ramp and the one above have been colored and stamped. Nice work.

31 October, 2016

Three Days in One


Thursday, Friday, Saturday, and Sunday. That would be 27-30 October, 2016. Ok. So I lied. Four days. Here's what's been happening around Casa Winjama.

Crack Ready For Patch
First off, this is a crack in the concrete patio that we've had virtually since the problems with the pool began. Endher has just finished pressure washing it. A little later on, you'll see the results of the patch job.


Concrete and Beam About Done
The scaffolding extends the whole length of the pool. The guys are almost done plastering the columns and the beam.

One thing that's happened, is that the metal beams spanning the pool were, unfortunately, not properly prepared no painted. We have flecks of blue paint all over the ground. The metal guy is supposed to be coming back Monday to refinish them. What that is going to entail is removing all the old paint from the beams, probably with a pressure washer, then it's a three-step process to finish them. Each beam has to be painted with Ospho.

Ospho is a product, that when applied to rusted surfaces resists and retards rust. Ospho drys to a tough, hard surface that gives 'tooth' which makes it ready for priming. Common knowledge incorrectly says that you can't paint over galvanized metal surfaces. Ospho allows you to do exactly that. I did it with the previous galvanized framework that held our awning. It held up very well, even in our light salt environment, for the seven or eight years that we had the framework and awning up. I used two coats of Ospho, two of metal primer, and two of metal enamel

With proper application of Ospho, primer, and top coat, a paint job will last much longer because subsequent paint coatings securely attach so that moisture and oxygen do not attack the painted metal. Ospho is water-thin, covers a larger area than paint, and goes on easily. It is equally effective for exterior and interior work alike.

Overhead View Smoothing Pool Walls
Here's a strange view. I shot this looking straight down as Erwin was chipping at a concrete patch to smooth it down for finishing inside the pool. The wall of the pool is at the bottom of the photo.


Plumbing Almost Finished
The plumbing is almost done. About all that remains is to hook up the ½ Hp pump for the waterfall. This is a very clean and professional looking installation.


The Rest of the Valving
Here's the additional valving to complete the connection. I think the valves control the spa jets, waterfall, and inlet eyes for the pool itself, but don't quote me on that. I'll have to work with Bani to make sure everything is labeled as to its function.


½ Hp Waterfall Pump
I rode with Bruce and Colleen Saturday to Belize City. Bruce had an appointment with Dr. Hoy to check up on his cataract surgery, so I tagged along to keep Colleen company as she drove. I also wanted to stop at Pumps and Motors on the Northern Highway for a ½ Hp pump to use for our waterfall.

Turns out they were too expensive and they didn't have exactly what I wanted anyway. I was all set to kick back and relax while Bruce did the eye doctor thing. Colleen asked if I wanted to stop at Bennie's for a pump. Good idea. So that's where we went, and surprise, surprise, they had exactly what I wanted for just a hair more than I had planned to spend. I brought this one home. Hopefully, it will get installed in the next day or two.

Bela Showing the New Patch
I mentioned the patch job on the patio earlier. Well, here it is, with Bela showing how much she likes it. Very nice job, even matched up the 'mortar' lines in the concrete. After a month or two, it will fade enough that you would be hard-pressed to tell the difference between it and the surrounding red of the patio.


Pump House Porch Light
This is our new small porch light for the pump house. Complete with a separate electric eye to control it. Both work like a charm.


Pump House Motion Detector
We also have up in the roof overhang a motion detector light. I didn't know that spot was there when I told Bani that I wanted a porch light installed. If he had said that there was already an overhead light, I probably wouldn't have asked for the porch light. But they both seem to work well with each other, so no problem.


Pump House Interior Light
The last bit of lighting for the pool house is the inside light way up in the ceiling. I opted for an industrial safety-look fixture. Works well.


Floor Drain Under Tape
Before the floor for the pump house was cast, Endher said he was going to install a floor drain for the pump house, just in case. And after it was cast, you couldn't see any sign of it, till he flexed the tape covering and popped of some of the concrete poured over it. This will be cleaned up and it's going to look and work great.


Bruce's Appt. With Dr. Hoy
I mentioned riding with Bruce and Colleen to Dr. Hoy's. Here's a shot of them both going over calendars with Dr. Hoy. He's a very nice, caring man and an excellent eye doctor and surgeon as well. He did my cataract surgery too. You can read all about that on the blog at (http://www.winjama.net/search/label/Dr.%20David%20Hoy%20MD).


The Hour Bar and Grill
After we finished at Dr. Hoy's, it was time for lunch. We stopped at the Bowen family's newest restaurant, the Hour. Lunch was good, the draft Belikin was good too, but I think I still prefer the Riverside Tavern. Something about the ambiance of a pub, or at least an American idea of a pub, at any rate.


Pig on the Hour
The Hour has at least three or four gigantic BBQ pits, made from some sort of industrial tanks. Along with the BBQ pits, they have two or three large smokers as well.

The pig you see here, came just a short time ago from one of their BBQ pits.

05 January, 2016

Pool House Expansion Project, Days 72-73 - 04-05/01/16

Caulking, Insulation, Screening, Attic Lighting, Concrete Patching

Days Seventy Two Through Seventy Three , 04-05 January, 2016

One of the benefits of catching a day with sunshine is that even if it's not shining directly on an object, you can still receive a hint as to what's going on. Such as where the caulking has missed or failed to bond with neighboring pieces. If you look closely below, you'll find several places where the silicone caulk didn't adhere quite properly, or in some instances aware
Caulking Gaposis in North Gable
There's a few small caulking holes in the south gable end, although they don't show up in this photo.
More Gaposis South Gable
Some little things in the overhead that still need to be taken care of - e.g., the LED pot light over the shower. That'll be solved some time today.
Shower Light Yet to Be Set Up
One new addition near and dear to my heart for some reason, lights - one at each end of the attic.
Attic Light Installed
And, a switch for the same two lights close to the access hatch for the attic. Wiring for those lights and the switch still needs to be stapled in place.
Attic Light Switch
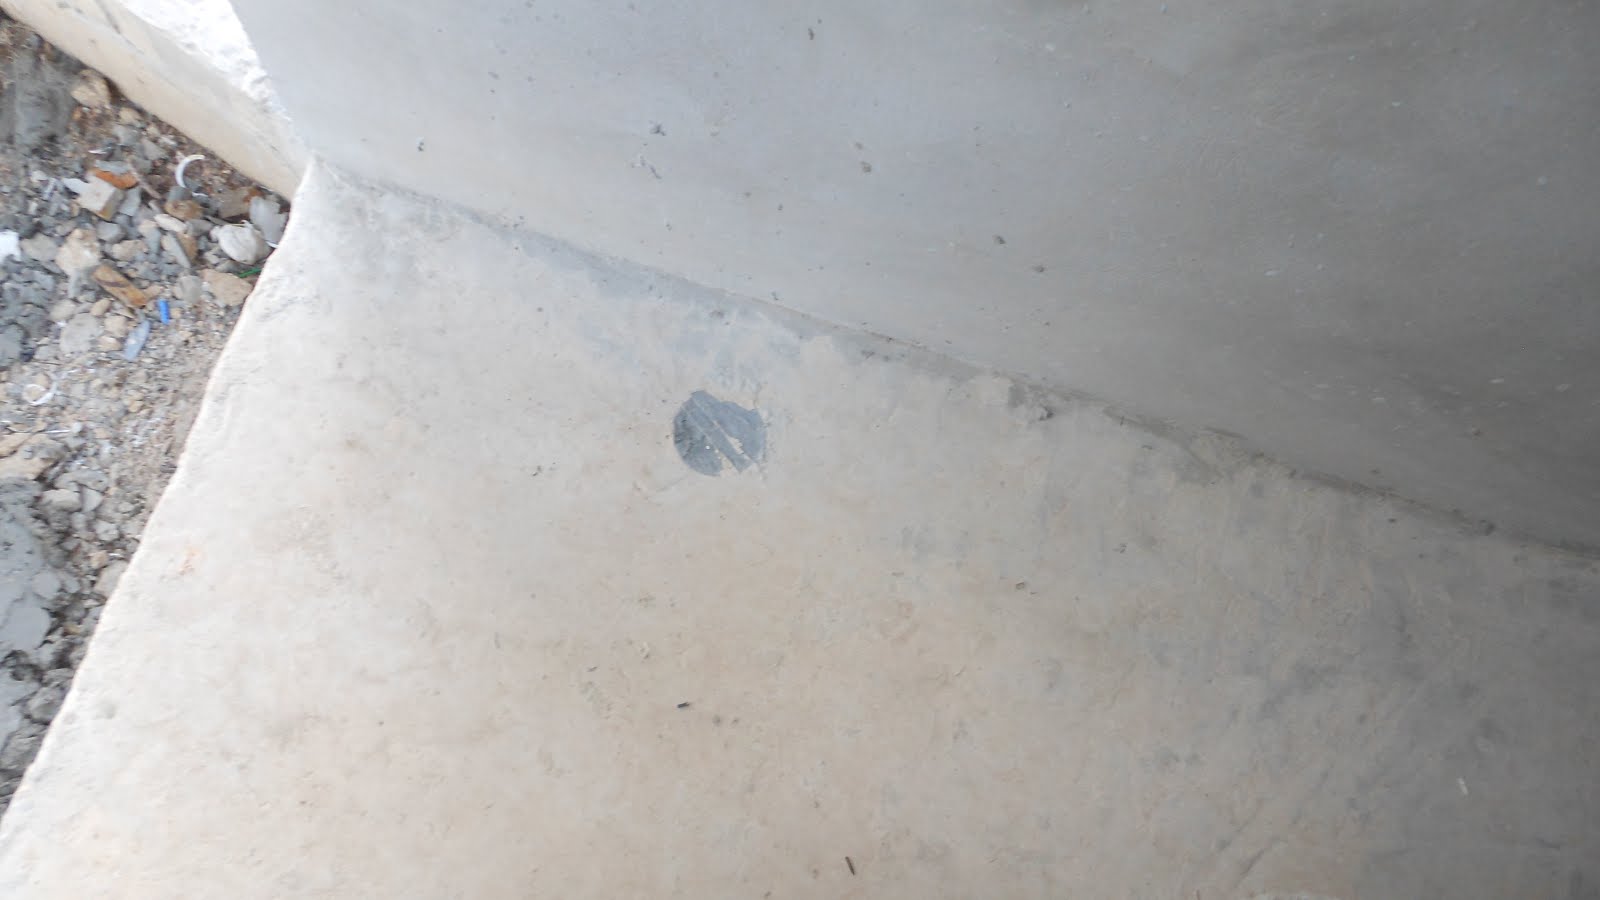
This is a detail shot where the electrical conduit goes from the breaker box, outside and up to the roof. Hole still needs to be patch with mortar.
Mortar Patc Needed Where Conduit Enters Behind Breaker Box
Same holds true for where the conduit passes through to the roof.
Concrete Patch Neede Conduit to Roof 
Where the conduit passes through the wood gable on the north end, that needs caulking.

Caulking Needed Around Conduit Coming In
As do the bolt heads anchoring the gable trusses.
Caulk Needed Over Bolt Heads
We're getting closer now. The R-19 Kraft paper-backed fiberglass insulation of going up smoothly. I think this is in the office.
Insulation Going In
Simutaneously, George has been busy assembling the frames for the walkway and veranda screens.
George Assembling Screen Frames
Probably not the most comfortable working location around, but necessary to make sure the insulation is spread properly.
Up In the Attic
The fiberglass insulation is fairly easy to work with, especially when you use a machete as a saw to trim it to length and width. The guys had asked me what was a good trick to avoid itching caused by the insulation. I only knew about wearing long sleeves and long pants and showering. The clothing didn't reall impress them that much, and they didn't think the showering on its own was very effective.

I looked up on the Intertubes about the issue. Opinions seemed to be split on the benefits of hot vs. cold showers after working with the stuff. I did find out that most pros recommended using talcum or baby powder applied liberally before working with the stuff, was fairly effective. You have to be sure to really rub it in around the neck and cuffs of shirts. And, after a shower, a popular recommendation was to rub down affected areas with coconut oil. So, I passed all that information on to the guys.
Insulation As It Comes Out Of the Pac
Here's another view of the office insulation. It's already making things look more official.
More Office Insulation
Some more items that need attention. The conduit pipe, in addition to needing caulking as it enters the wood of the gable, needs to be painted with the chocolate brown that was used for the soffit work.
Conduit Needs Painting
Sure signs of reaching the end of the project. A stack of green board drywall, for use in the bathroom, walkways, and veranda, since it's water resistant, and those areas are more subject to water incursion than in the house proper.
Green board Drywall Sheets
And regular drywall, that will be used everywhere else throughout the house.
Drywall Sheets
This morning, the guys look like a bunch of terrorists. Tee shirt masks offer some protection from fiberglass dust.
Fiberglass Dust Protection
Another sign of progress - the trial fitting of the screen frames all around the house.
Screen Frames West Side Trial Fitting
As Carl and I were walking up to the house this morning, we heard a commotion and looked up in time to see a section of insulation and furring strips coming down. Apparently Omar and a couple of the guys were attempting to adjust the spacing of one or the other and, oops, down it came. An easy fix getting it back up, just meant a bit more secure with screwing it into place. 
Furring Strip Adjustment Fail
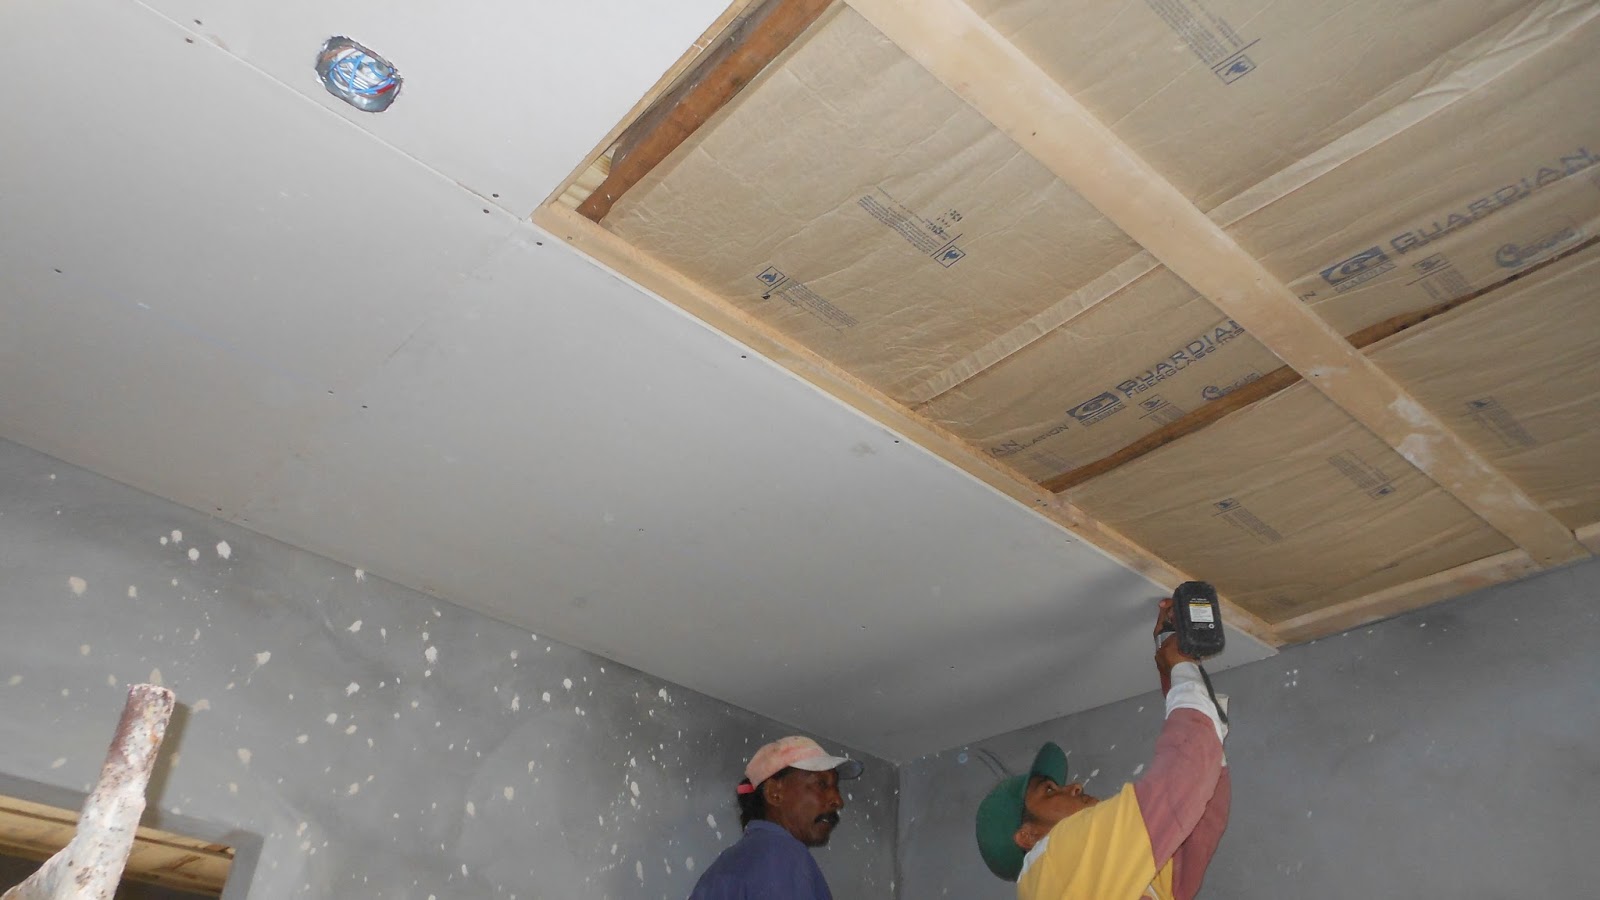
Just this afternoon I heard what sounded like screws going in, so I headed back down to the project, and there it is, actual drywall going up on the ceiling in the office. Man does that give the place a finished look. What a difference!
Office Getting Drywall on the Ceiling
Here's a little larger view. By now, that hole has probably been filled with drywall. Progress is moving right along.

Carl said the guys are going to be doing the banging stuff during the day and mudding and taping, etc., in the evenings, so things should move fast.
Office Ceiling Drywall Almost Complete
And, speaking of fast, the office ceiling is now done, and now they're almost done with the living room. In fact, by now, they're probably drywalling the bedroom.

Here, they've got two more pieces to hang in the living room. They're beginning to trim a sheet to the proper size.

Drywalling the Living Room 3.24
I noticed they were using a razor knife to trim the edges of the drywall. I went and got my 3" Stanley Sureform tool - sort of a plane with a bunch of little teeth. It makes quick work of trimming drywall edges.
Trimming An Edge 3.24
In this shot, they're using a chalk line to strike a center line so they can apply drywall screws accurately.
Striking A Center Line 3.28
And now they're driving in those screws. One piece of drywall left to go in the living room.
Screwing Down the Center Line 3.29
Here comes the last piece. It's not quite going to take them five minutes to do the whole thing, and they're not even hurrying.
Bringing In A New Sheet 3.31
Up it goes, and then on to the bedroom.
Positioning the Last Piece in the living Room 3.34
There's many more photos than appear in each posting. You can see all the photos of the construction project on Flickr at: https://www.flickr.com/gp/winjama/0wVc3s. There will be new photos added each day of the project.