Here we are at another day of the Pool House Expansion Project.
Day Twenty One - 16 October, 2015
It's taken me a while actually to be able to write this and several other blog postings. The date, 16 October, is when the photos and the narrative occurred, but due to several glitches, one with the PC, being terminal and requiring a new motherboard and a new hard drive, thanks to Fred at Corozal Virtual Offce, for his good work resurrecting my dead PC. The other, as far as the blog is concerned involved my iPad. I can create text relatively easily with the iPad and dump it directly to the blog. Where the problem comes in is if I want to add photos, like what are here. That is very hard to do with the iPad.
It was such a hassle, all together, that it was easier to just lay off doing postings for a few days till the PC was back functioning.
Finally, I listened to what my doggies have been patiently trying to tell me, that having all three of them tied up on a chain, sucks. I decided they needed to have a pen or run so that we could keep them out from underfoot either with the construction or, during pool parties and the like, they wouldn't be coming around mooching from our visitors.
After getting the idea for the run, where to put it was the next question. I decided that using the breezeway where they currently get tied up made sense, and I added on the virtually unused space adjacent to the house beside the raised bed of the garden, as you see below.
I had a roll of chicken wire that I decided to use for the project. Chain link would have been better, but this was here and available. I had Carlos build a couple of short walls at either end of the run, as you see below. The walls are just getting started here.
 |
| Blocks in Progress At Both Ends of Run |
Carlos and I ran the chicken wire the length of the run. You can see Carlos fitting the wire to an end post.
 |
| Carlos Fitting the Chicken Wire For the Pen |
We ran wire through each of the tubes supporting the garden awning
to support the chicken wire. Not the prettiest set up but it works.
 |
| The Dog Run Extends Behind the House |
The pen runs almost the whole length of the house, so there's plenty of room for the girls to walk around and see what's going on in their neighborhood.
 |
| The Other End of the Run |
The hinges I purchased were designed to be fastened around a stationary tube and bolted to secure them. I had to put the male end of the hinge in my vice and pound them into shape so that they could be bolted to the concrete column as you see below.
 |
| This is How the Reworked Hinges Will Be Attached to the Column |
We managed to scrounge a five-foot length of chain link from
Lano's Hardware. They don't sell partial rolls of chain link as a rule, so we were lucky to get this bit, which was perfect. Here's the gate, in all its glory, with hinges attached to the column, and on the other end, the latch, attached to the gate, uses a short length of fence tubing that I bolted to the wall so the latch has a stop to secure it when it's in the down position.
 |
| Here's the Gate in It's Closed Position |
The gate can open either direction, and opens up fully to allow complete use of the breezeway when it's not being used for the dog run.
The big butane tank you see laying on its side, I got from Sara and Jeff. It's not usable as a pressure tank any more, but I had the bright idea that I would try to make a large wind chime bell out of it. I plan to have the bottom of the tank cut off and smoothed, and where the valve goes at the head, I plan to suspend the 'bell' from an eye-bolt affair that also hold the clapper for the bell and below that, the flat piece that is moved by the wind that causes the clapper to contact the edge of the bell.
If it works, it should produce a deep, mellow gong sort of tone... I hope. Another project. I let you know how it goes.
 |
| The Pen Gate Still Allows Use of the Breezeway |
On with the construction, which has been proceeding apace with the construction of the dog pen. Here, it's a break in the rain, that we had for about a week that really played havoc with the construction schedule.
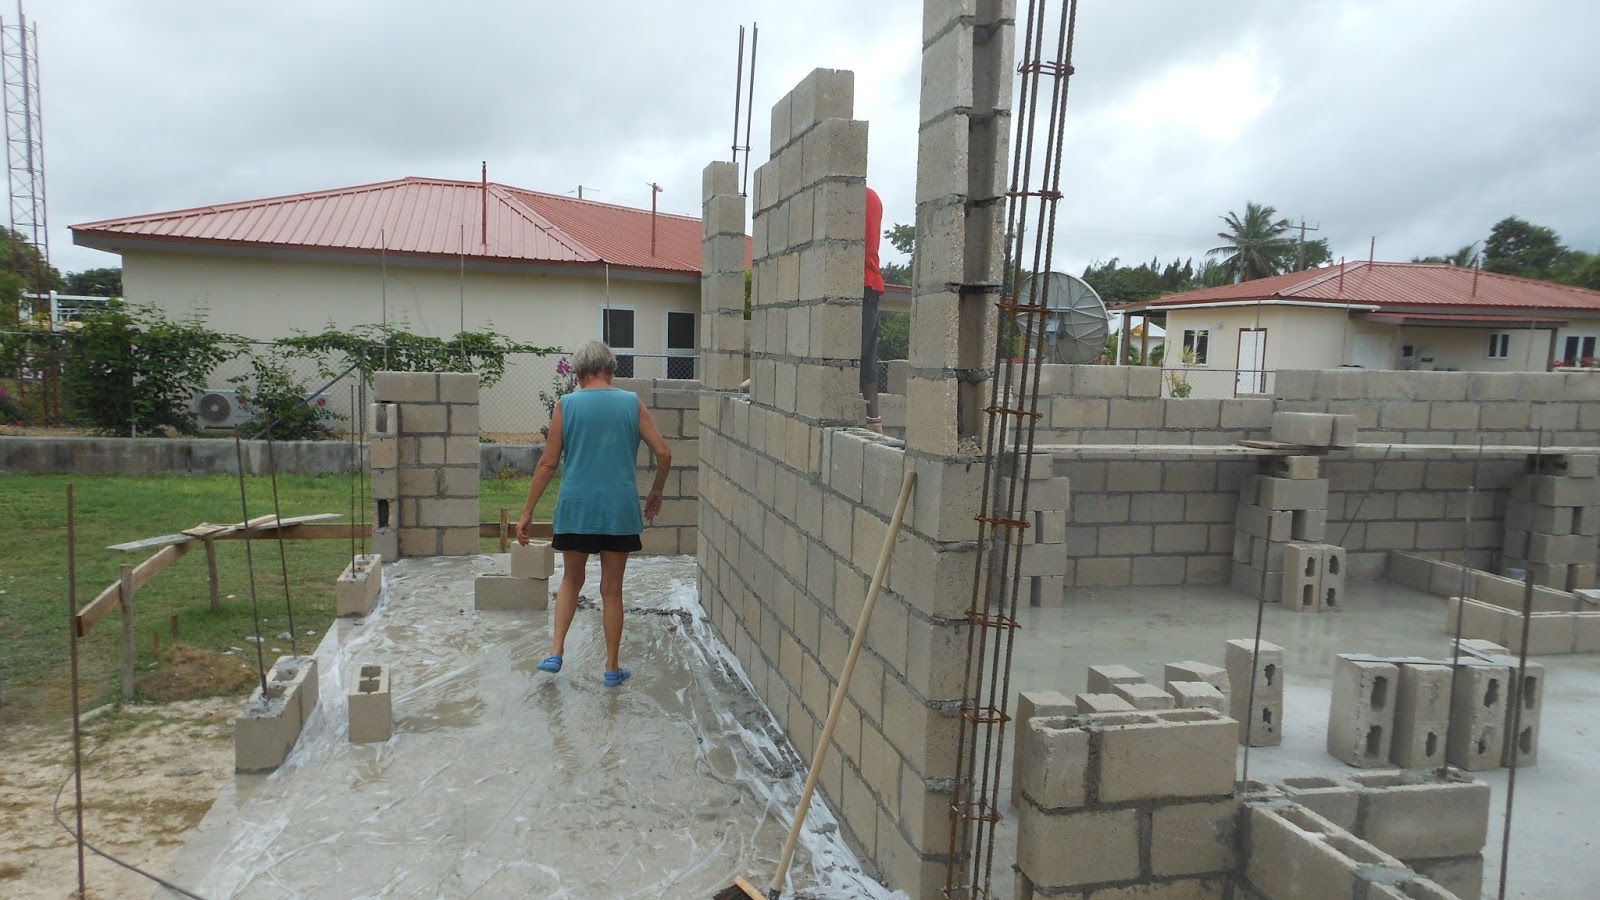
Dianna's taking advantage of the break to inspect the veranda. This is the east side of it. The east and west sides of the veranda are both six-feet wide.
 |
| Dianna Inspecting Veranda in the Rain |
The south part of the veranda is four-feet wide as you can see in the image below.
 |
| Looking Down South Walkway of the Veranda |
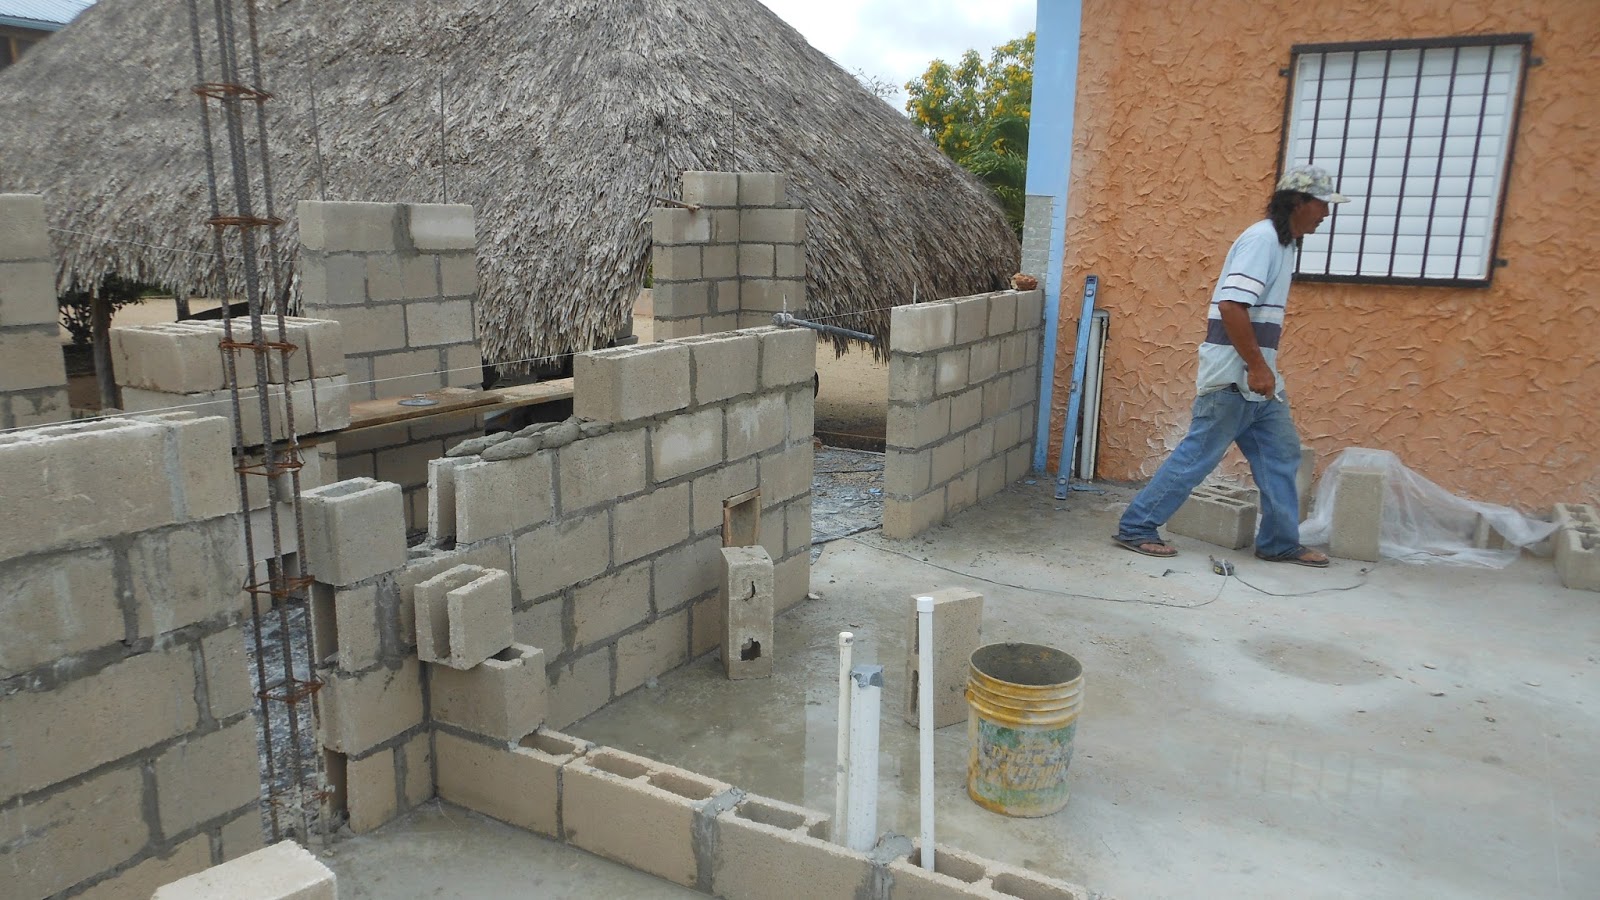
The walls are continuing to go up at a fast pace. We continue to be appreciative of the quality of the block-laying. Very professional crew.
 |
| Digging For That Last Bit of Mortar |
This view is looking toward where the office will be.
 |
| Looking Toward the Office |
That's it for this installment. Stay tuned for more.
There's many more photos than appear in each posting. You can see all
the photos of the construction project on Flickr at:
https://www.flickr.com/gp/winjama/0wVc3s. There will be new photos added
each day of the project.


No comments:
Post a Comment