Here we go, after a mini hiatus. You know how it is, with Christmas, and New Year's, and this and that. Some things just slipped by the wayside for a few days - like everything on this page. Anyway, this is a good opportunity to get caught up.
 |
| Noel Going After Nelson |
Our little girl, Noel, started off barely able to fit in a teacup, on her last visit to Dr. Sheila, tipped the scales at a little over four pounds. For such a little girl, she has been giving Nelson a genuine run-for-his-money. He's lucky she can't yet jump from the floor to the island top. She's working at it, and has figured out how to keep Nelson on his toes.
 |
| Cleaning Concrete Splatter Off |
Even though the workers have been very careful throughout the project, some spattering still has to occur. The tool bar took its share of spatter. Thankfully, they clean up their messes.
 |
| Touching Up Paint After Welder. |
After Carlos the welder got done installing the ramp rails, there was still some cleanup to be taken care of. Wherever he welded a support for the rail, there was a little welding spray that needed to be touched up.
 |
| Installing Waterfall LED Light |
After a suggestion by Mario to add in a small mood light for the waterfall, his guys worked to get it installed. The actual light fixture is just behind this beam and will shine down on the waterfall at night.
 |
| Waterfall Rotating Color LED Light |
Here's the fixture installed and working. Red, blue, and green LEDs rotate their colors to show off the waterfall.
 |
| Applying Roof Fabric |
After that comes the roof fabric. Stretching it became a real chore for the guys. There wasn't a lot of spaces in order to get leverage and really tug on it.
 |
| Stretching Roof Fabric |
But, little by little, the fabric stretched and stayed in place, as we wanted.
 |
| Circular Stairs Going in |
The circular staircase we bought from Eric Burson has worked out very well with little extra welding required to make it fit.
 |
| Ladder Reaches the Top |
And it actually reaches the sky too. All the way up to the roof. What's cool, is it looks like it always was there, like it was part of the original design, not a spur of the moment after-thought, when I saw that Eric was selling it.
 |
| Roof Fabric Nice and Taught |
The roof fabric, the same sort of shade cloth as the side panels, is now fully stretched and in place. It really looks nice and smooth.
 |
| Well Earned Pizza Lunch |
As a thank you for the crew, right before the Christmas holiday, we sprange for pizza and Coke for everyone. I got six Supreme pizzas from
Corozo Blue's that morning. I had iced down a case of Coke the night before, so by the time it was lunch, everything was ready.
We made a lucky guess on how much pizza to order. When all was said and done, there were five slices left over.
 |
| Getting Ready For the Feast |
For our Christmas Day dinner, it was a sort of pot-luck affair. David and Elizabeth brought a wonderful ham, and some nice home made bread, Denis and Vivien brought a nice cheese spread for
Hors d'Oeuvres (A big tip of the hat to
Google Spell Check for correcting my attempt at those two words
). I made a first attempt at stuffed 'shrooms with a recipe I found the night before. I was lucky.
 |
| Some Hors d'Oeuvres |
Everyone being polite before diggning in on the hors d'Oeuvres (have to use it now that I've got the spelling).
 |
| Packaging Up the Booty |
I forgot to take any photos while the meal was in progress. Here we are dividing up the spoils from the dinner. Even after David and Elizabeth took the preparer's portion of the ham, there was still a more than generous portion for all of us as left overs.
 |
| Hey, There's A New Cover |
I got the new pool cover into the pool, more or less trimmed to size, and mounted to the reel, just in time to have to move the reel precipitously close to the water in order for the guys to seal the deck.
 |
| Freeing Up Spa Jets |
While they were sealing the deck, Randy got into the pool with a hammer and chisel. Ever so carefully, he chipped around each of the three spa jets to free up the outer rings which control how strong each jet is. They work fine now.
 |
| Chasing Down A Leak |
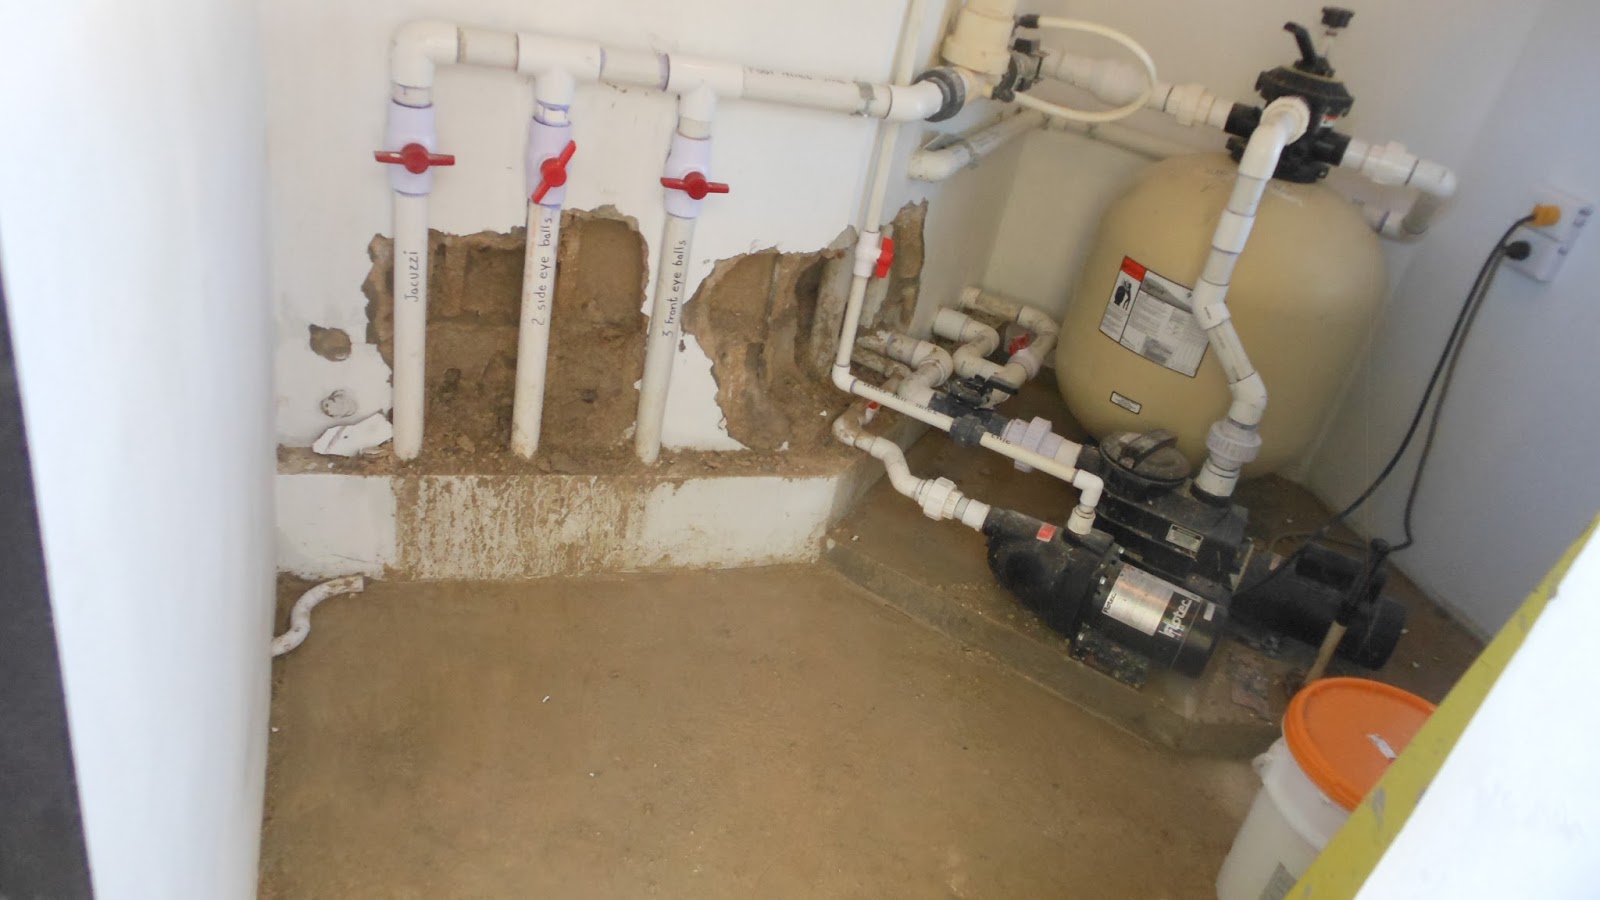
Turns out there was a small leak inside the wall which was keeping the inside wall of the pump house moist. They punched a series of exploratory holes and filled each cavity with concrete. That took care of that leak problem, but another surfaced from another pipe through fitting. They're still working on that one.
 |
| Filling the Holes |
Here, they're filling the cavity, using a half-piece of three-inch PVC pipe as a trough to pour the concrete mix into the hole.
 |
| Clear Acrylic Sealer |
Easy to see just what a difference the deck sealer makes. Wow! It just brings the concrete stamping to life. Very impressive.
 |
| What A Difference |
Endher is working his way down the ramp. I'm still amazed what a difference it makes.
 |
| This Sealer Came From Merida |
Here's the sealer. It's only available in Chetumal. This particular brand is only available in Chetumal and Home Depot, and as luck would have it, they were out. This bucket came down from Home Depot, Merida.
I'm going to check with Lano's to see if they can get it or a similar product, as we'll have to re-apply the sealer about every year-and-a-half or so.
 |
| Getting Near the End |
Endher getting near the end of the sealing inside the pool enclosure, and heading down the west ramp. I thought it looked really good, but Mario wanted another coat today on the inside. The stuff is pretty cool. Stinks to high heaven as it's being applied, but dries in about a half-hour. It applies easily with brush and roller. It has a sort of gel-like consistency, which makes it very easy to work with.
 |
| Our Christmas Tree |
Naturally, I did't take a nice photo of the Chrismas tree when I should have, so right before Dianna and Vivien took it all down, I took several shots, with this one being the best of the lot.
 |
| The Cursed Toilet |
With the guys chasing a leak in the pump house, I've been chasing one of my own in the bathroom just off the kitchen. It's taken three days so far, and Denis even came over to help yesterday.
I replaced the last part, this morning, the bit that holds the flapper. I also added more gasket material to the two bolts that hold the tank to the bowl, and it still leaks.
I'm letting the tank dry out and then I'm going to silicone the sh** out of the bolt heads before I add more water back into the tank. If that doesn't do the trick, I may have to resort to buying a new terlet. I hope not.
 |
| All New Innards - Still Leaking |
Here's the innards of the tank. Everything is new inside that you can see. But, like I said, it still leaks.