But, first this word...
I mentioned a couple of days ago about Cody oiling our deck. He did a really nice job of it. I just thought I'd include a shot of the result. It's had some time now to soak in nicely. As you can see from the photo, it has absolutely brought the wood back to life. The color is deeper, the grain sharper, in short, it's gorgeous.
The one downside to it is that the deck is decidedly warmer (as in hot) now, when you walk across it in bare, dry feet. It's tolerably comfortable when you've been in the pool and walk on it with wet feet.
What a difference it has made. The gray weathered look is totally gone.
 |
The Beautiful Deck
|
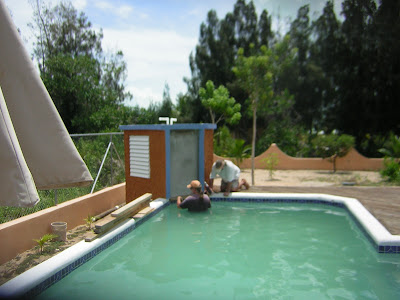
And, also leading up to the mosaic installation, Cody also finished painting the pump house. He painted blue trim, which matches the decorative block and wood railings of the house. Then he painted the walls with the same terracotta as was used on the house. A bit darker than what was used on the fence.
 |
| Cody Painting Trim on the Pump House |
 |
| Cody Painting the Walls of the Pump House |
Now, to the business at hand. Here's the whole process - well, as far as we got it done today, anyway.
First off, this morning I had to retrieve the mosaic from my workshop, which has become a storeroom once again. Anyway, I fished it out and then spent a few minutes prying grout out from the screw heads, which had been applied to hold two 2x4s that acted as backing for the mosaic. Turns out, they didn't really work all that well, as the PlyCem (cement board) had warped slightly into a sort of bowl-shape, which meant that when we stuck it to the wall of the pump house, that we'd have to use a few more screws to straighten it out and get it to adhere correctly.
 |
| Mosaic in Storage |
After that, I loaded it onto my hand-truck and hauled it out to the guest house, with Dianna's assistance as the mosaic weighs in the neighborhood of 50 to 60 pounds.
The guest house became my impromptu workshop. Here you can see it laid out on a folding table ready for me to work on it. I had to trim about 2 inches off the top and bottom with my saber-saw in order to get it to fit just under the waterfall. It's lucky the mosaic wasn't any wider. I would have had to trim that as well if there had been about another quarter of an inch to its width.
 |
| Mosaic Ready for Trimming |
I had to run into town to get screws and anchors to help support the mosaic. No easy task, I thought, since today is Labor Day here in Belize. Everyone is off work. As luck would have it, I happened to call Doug and mentioned I screwed up by not getting sufficient supplies beforehand. He told me
Villa's Supply was open this morning. What a break. I jumped into the Isuzu and headed into town.
There, I explained to the young man what I wanted to do and what I thought it was that I needed. He said, "why don't you use "blue screws? You won't need anchors with them. So, he sold me a bunch of them, along with a bit, one size smaller than the screws.
As I headed back, I saw Doug at his house, just after I turned onto our road. I told him what I'd bought, and he said, that it was cool. He'd used them a bunch of times and that they worked great. I'd never used them before, so that was good to hear.
I told him I'd be ready to do the mosaic as soon as I got home. He arrived about 10 minutes later on his bike, and we got to work.
First, since the mosaic is so heavy, we decided to position a piece of wood at the bottom, as a rest for the weight of the mosaic. Here you can see we're fastening it (with more blue screws, courtesy of Doug). I damned near ruined my Craftsman 18V drill, concentrating on drilling and not on where the water was.
 |
| Applying the Wood Brace For the Mosaic To Rest On |
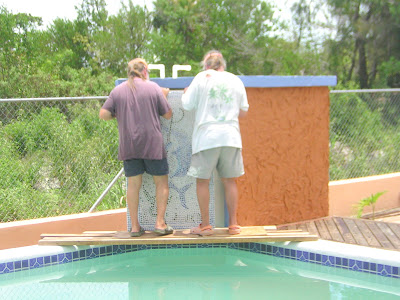
 |
| Figuring Out How to do It |
Having done that, we were ready to "glop" on the adhesive - a waterproof (or at least water-resistant) tile setting adhesive. Here, we're using a scrap piece of plywood as a mortarboard.
 |
| Skilled Craftsmen At Work |
And, right away we begin troweling it on. According to the bucket, we had about a 20-minute work window for the stuff. Of course, that's figured on working in mainland US of A, not Belize. So, maybe we had somewhere between 10 and 15 minutes.
 |
| Troweling The Adhesive on Nice and Thick |
 |
| Just Go Ahead and Glop it On |
A study in concentration, we both worked fast and sure. Actually it was quite a large area to cover - about 2'10" by 4'6", all in one shot.
 |
| The Mark of a Pro - Pencil Behind the Ear |
 |
| Merrily We Trowel Away |
Then, we brought out the mosaic - carefully, I might add. Making sure we had it right side up, we were ready to apply it to the wall.
 |
| Somewhat Nerve-wracking Work |
 |
| Getting It Into Position |
 |
| In Position and Stable |
 |
| Doug Uses a Couple Small Wood Bits For a Better Fit |
 |
| Doug Adjusting the Mosaic |
As soon as we were happy with the positioning of the mosaic, I started drilling holes and running in the blue screws, which really did a great job of drawing the mosaic in against the adhesive. We used eight screws altogether. Probably more than we needed, but it did give us a nice comfortable feeling.
 |
| Applying the Blue Screws to the Mosaic |
 |
| Finishing the Blue Screws |
And, finally, here's the end result of our labor. It really looks cool and finishes off the pump house nicely.
 |
| The Mosaic In Place |
 |
| The Mosaic Looking Good |
Of course, I still have to add grout around the edges, ensuring a smooth transition to the waterfall lip itself. And not to forget, covering the screw heads in the mosaic with grout and then applying glass stones over that in the appropriate places.
When it has the afternoon sun shining on it and the waterfall running, it is just going to be absolutely sparkly. We couldn't be happier.
Just a reminder, that the mosaic is a piece that we commissioned Gale Peterson and Ali Shandiz to do for us. Their website (
http://cpsnetworki.com/Homepage.htm) has quite a bit of the art and projects they are involved in. I also follow their blog,
Virtual Existence Time Machine (
http://iguanamountain.blogspot.com/), which is listed on the right-hand column of this blog.
Thanks, guys. As you can see, we've finally gotten it installed. I know you thought it was doomed to spend eternity in darkness, but now it's out in the light and we love it!


No comments:
Post a Comment