Pages

28 June, 2017

A New Shed, Page Three

This project is moving speedily along. Of course, being less than 1,000 square feet helps make it quite simple.

Electrical and Water Service
Both water and electricity will be coming from the parking palapa, just a simple splice job on both parts. I'm not expecting any great demand on either at this location, so we should be good to go.

Soak away is already done and filled to the brim with rocks. That will be dressed up in a bit as you'll see.


Ender Plastering the Back End
We asked that the exterior finish more or less match that of the new house and pool area. It should look very good when done.


Fixing Up the Soak-Away
All that remains for the soak-away is to frame it with blocks and fill the remainder with gravel.


Roof is Coming Along
With a project this size, it's hard to keep up with everything. Each bit moves along fast. Like the roof.


Add caption
And the interior walls. Stucco is going up on all sides of the interior.


Outside Parging (Plastering)
Outside parging is almost done. Then comes  color coat of the same material.


Cleanup in Progress
Cleanup of the construction area has started as well. One good thing with Mario's crew, they have been very neat and tidy through all of the projects. Not like some we've had that cleanup takes weeks.


Worried About Clearance for the Doors.
There's still work to be done on the roof framing, so I think this will pretty much take care of itself.


Cleaning Up the Soak-Away
Blocking in the soak-away. It'll look sharp in just a few minutes.


25 June, 2017

A New Shed; Page Two

This is a continuation of the post about the new Utility and Storage shed that our contractor, Mario Zetina, is building for us. You can read the original post here: http://www.winjama.net/2017/06/a-new-shed.html.

And here we are now. It's Saturday. Work was delayed Monday through Wednesday because of fairly heavy rain during the night, each evening. That, as Mario explained to me, affects the materials - sand becomes too wet; concrete blocks have absorbed too much water and affect the mortar holding them together. The water in the blocks wicks into the mortar, making it too squishy and less able to hold the blocks steady till the mortar sets.

So, as I said, work began anew on Thursday.

Trench For Water and Current
The workers spent part of the day digging a trench to run a water line and electrical service from the parking palapa, where they spliced into the existing services there. The trench runs in a straight line over to the shed.


Walls Going Up Fast
The walls for the shed are going up quite fast. In no time, those will be done and finishing plastering will have begun.


Water and Current Trench
Here you can see the trench going way over to the shed. They first had to peel back the Chippings on the driveway enough for the trench itself, but also so that the trench spoils could be placed until it was time to return them to the trench.


Here's Where It Begins
The water and current for the shed will just be tapped into the water and current that exists already for the parking palapa. No need for a new circuit or anything like that. There's just going to be a few light bulbs - interior lights, a porch light, and two motion detectors. They'll all be using LED bulbs so the load will be very low.


Window Space Going In
The opening for the window, which will be about 2'x4' will be on the east side of the shed.


Door Lintel Being Readied
Here you can see the lintel being formed for the door.


Going Up Fast
The end bits of the shed wall are going up. Each end has vent blocks in it to facilitate air flow and to keep the shed from getting hotter than it needs to.


Good View of One End
This view gives a good idea of how the vents will look in each end. The vent openings will be covered by screens to help keep bugs and other critters out of the shed.


Last of Elsie's Palapa
 This poor truck gets overloaded so often. Like here, it's tasked with hauling off the posts and other wood that made up the bones of Elsie's palapa. This stuff, like all wood here in Belize, weighs a ton. It's so heavy in fact, they were worried the rack on the back, which is carrying the largest pieces of wood, would collapse before they could get it off-loaded. It made the journey safely.


Ridge Beam In Place
 A sure sign of much progress is the installation of the ridge beam. This will support the rest of the roof


Ramp and Landing Getting Formed
 Here, the ramp and entry landing are being formed up. We're not having fancy railings on this structure, just a small affair that will keep a wheelbarrow or mower from running off the ramp.


Digging the Soak-Away
 I didn't like the idea of having a sink, even something small like a 'hand-wash basin' as they call them here, just drain out onto the surface. So, they're digging a nice-sized hole that will be filled with gravel and will be the sink soak-away.


Interior Walls Being Finished
Rene is busy finishing off the first of the interior walls. This is the wall that will have the standard and bracket shelving on it to hold all the paint, chemicals and associated tools.


Skylarking Above Deck
It's nearing the end of the workday on Saturday, so time for a bit of relaxation and clowning for the camera.


Electrical and Plumbing
 Some of the interior fittings going in, an electrical outlet (right above where the sink will be... That's code somewhere, I'm sure), and the drain and supply for the water.


More Electrical
On the opposite wall, the switch for the overhead lights and another electrical outlet.


Nice View From Inside
 An interior shot of the ridge beam and showing the vents - simply blocks laid on their sides.


Cleaning the Wheelbarrow
At the end of the day, when there's a little concrete left over, what do you do with it? Well, if you have a form set up for a casting, just dump it in there. It keeps the work area nice and tidy.


The Business End of the Trench
Here's the start end of the trench. Almost completed, just waiting for the plumber/electrician to come and connect everything.


View of the Full Trench length
And, here's where the trench was the day before. Looks as good as new.

There'll be some more photos and such on Monday (weather permitting). Enjoy your weekend.

23 June, 2017

Finishing the Street-side (Back) Porch

The back porch of the Mennonite House. This is also the street-side porch. We originally were going to redo this porch at the same time as the front porch.

Naturally, as things go, our money had to be spent on other things that had broken or worn out that had a higher priority than just rehabbing a porch.

Street-Side Porch Work
Once the guys got started on the porch, it took them very little time to strip the old screen materials out and have a nice clean porch to start with.


Ender Cleaning Up
Ender's busy bashing the old screws and wood out of the porch structure. It was tough going for some parts of it, like around the 4x4 posts which are very hard wood and after being in place for about ten years, have become only that much harder.


Framing Going In
Here, they've cut the treated lumber for the screen frames and are doing a trial-fitting of each of them. Once they fit properly, then it remains for them to be stained and then the shade cloth screening to be stapled to each frame.


Staining Screen Frames
The guys set up a regular assembly line for this project. Here, you can see the staining shop in action.


Sanding Screen Frames
Here's the assembly shop. Rene puts each frame section together and then sands them smooth. After that comes the trial fitting.


Time For A Snack
Some of the crew are still growing boys and require an almost continuous supply of food to fuel their growing bodies.


Attaching the Shade Cloth
Here's Ender getting the roll of shade cloth ready to attach it to the frame. This shade cloth is amazingly resistant to sunlight. All the screens on the walls of the pool house were originally the roof awning in the previous incarnation of the pool. So, they had been in constant use for eight or nine years already before we reused them on the wall screens, where we expect to get another eight to ten years use out of them before we need to replace them.

Of course, if we suffer some other damage, like from hurricanes or other storms, that's different and isn't part of the longevity equation. If they don't become damaged from something other than sunlight, they should last eighteen to twenty years. Not a bad investment and the stuff works as well as regular screening to keep bugs and such out.

Shade Cloth Going In
This porch job is speedily coming to an end and is a vast improvement over the old screening, which was really falling victim to sunlight and storm debris.


Porch Is Done
Now, the porch is done. Here's a view looking right up to the door. Really looks nice and clean.


Another View of it Done
The view from the other side of the porch looks just as good.


Long View South
From the inside, looking to the south, very nice and finished.


19 June, 2017

A New Shed

We (that is, I) just don't seem to be able to leave well enough alone. I just had to go ahead and start a new project, in fact, two of them simultaneously.

One project is replacing Elsie's palapa with a work shed, and the second is rehabbing the street-side or back porch of the Mennonite house.

Both projects started at the same time, but I've separated them into two postings. Replacing the palapa comes first simply because that's the way the photos showed up.

It's Seen Better Days
So, here's Elsie's palapa. We call it that because Elsie King, a friend of ours from Canada, used to own this half of the property and she built the palapa.

It's seen better days and is in dire need of re-thatching. Thatch is becoming more and more expensive. I have been wanting to build a shed of some sort so that we could move all the paint, bug killer chemicals, and yard tools out of the 'basement.' I also wanted to move the gas cans out of the well pump house, and the lawn mower needed a protected storage area as well. I'm hoping to also be able to shoehorn the storage rack in the west breezeway into the shed. That all will leave the breezeways clear and clean, instead of the junk collectors they are at present.

Cross Piece Coming Down
The first part of getting the palapa to come down is unbolting all of the supporting structure. Here the guys are unbolting cross braces. Even then, they still had to saw several of the timbers to get it to come down.


Reached the Ground
Finally, it's beginning to come down. It may look flimsy, but keep in mind just how heavy lumber is down here. This thing weighs a ton.

It never did really crash to the ground. It more or less, eased itself down gently.


Disappearing
The final dismantling of the palapa is well underway. All the thatch went off to the burn pile. It's several years old and has become much to brittle to even think of using it to patch holes in the parking palapa, which is in dire need of some serious thatch patching, as it were. But that's another story for another post.


Just the Posts Left
The only things left at this stage are the vertical corner posts. They're sunk deeply into the marl, and they also weigh a lot. They're made from a very dense hard lumber..

In the meantime, marking the dimensions of the shed are taking place around them.
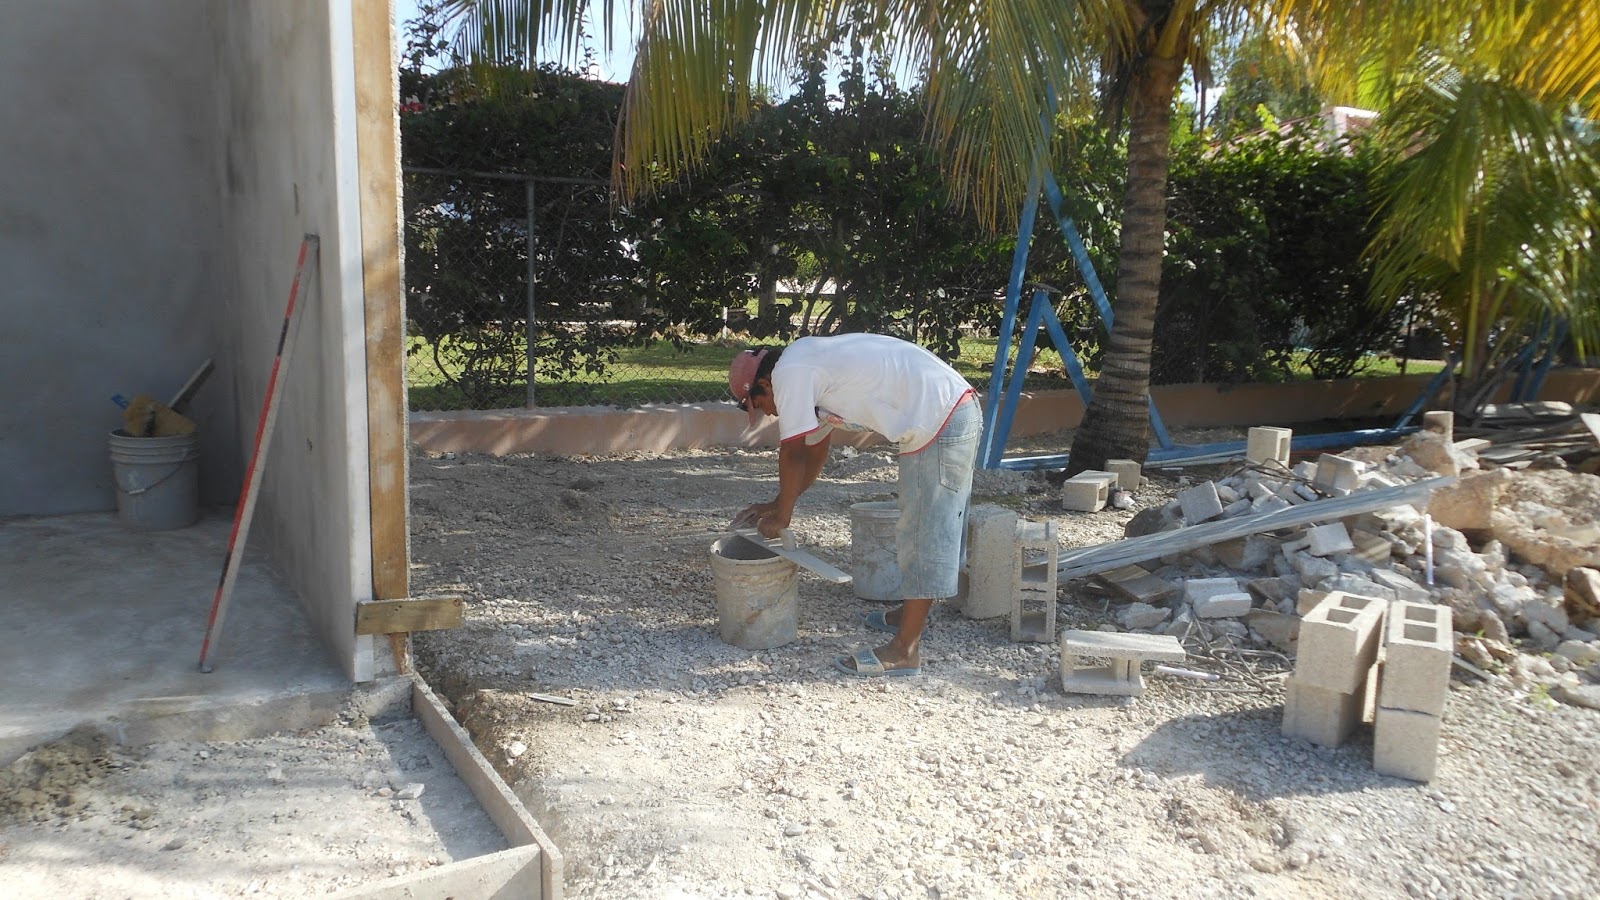


Digging the Footing
Even though the marl is almost as tough as concrete, it really doesn't take the guys long at all to dig a nice sized ditch, which encompasses the outer boundaries of the proposed shed.

Most of the marl that comes out of the footing work will end up being spread along the fence behind the shed.


Sand Arriving
Of course, even though we have a couple of nice piles of gravel and sand around, one can never have too many of each. Especially the sand. That's very popular with both the dogs and the cats, but for very different reasons. The dogs love to play king of the mountain, and the cats, well, they put the piles of sand to a more practical use, you might say.


Adding Steel
With posts still in place, the footing trench is coming along quite nicely. Here, the guys are adding the steel (rebar) to the trench which helps strengthen the concrete.


Footing Poured
And, just like that, the trench is full of concrete. Well, a bit slower than that. Actually, it's a lot of wheelbarrow loads of concrete. Soon we should see the walls begin to rise.


Floor Ready for Pour
Next came leveling out the middle section and laying a rebar mat of concrete which will form the shed floor.

You can see the wood forms already in place to contain the concrete that will be poured to made the floor of the shed.


Collection of Rubble
The rubble is mostly old curbing that once defined the driveway edges. We had to take some out so that the new parts of the driveway could join with the old.

This also has the piece of curbing I fell against two or three years ago when our dogs Cindy, Secret, and Deeohgee, all got into one of those weird fights that happens now and then with dogs. Unfortunately, Cindy ended up losing her life as a result of the fight. I almost broke my back trying to separate the three of them. I fell, rather violently backwards and landed square across my lower back. I was bedridden in mucho pain for about a month.

There's other bits and pieces of concrete rubble, like our birdbath that mysteriously flipped off of its pedestal, broke into a bunch of pieces, and cracked the base. All that ended up in the pile as well. We suspect Noel of being the guilty party by jumping from the circular staircase onto the bowl of the birdbath. But, she won't admit to it.

First Row of Blocks
Now, the first row of blocks is going in. When the weather is nice, things move fast. Of course, now we're entering the rainy season, so we're expecting to have some delays in the construction.


Landing Hold Some Rubble
Here's some of the rubble going into the landing for the shed. As it turns out, the guys were only able to use about half of the rubble in the shed. They'll be hauling off the rest of it at the project end.


Floor Poured
And now, the floor of the shed has been cast. The PVC piping you see is where the water supply and electrical service will be coming through.

We're going to have some LED lights inside and an LED porch light with an electric eye. That will be centered over the shed door. I also want to have a couple motion detection lights at either end of the shed.

Wall Tools Installed
I couldn't figure out what they were doing when these steel 2x4s were installed vertically. I asked Rene and Ender about these. Turns out they're tools that they use to help ensure straight edges of the blocks in the corners, and as tools in determining window, lintel, and roof height and pitch (I think). Anyway, there's marks all over them. They have a collection of eighteen of these things. Well, as long as it works for them.


Just About Done for the Day
This is day two of the block-laying. It rained quite heavily early in the morning, but really cleared by 9:00 AM.


Window and Sink Location
This shows the window (louvered) location. The utility sink will also go here. It's only going to have cold water, and will drain into a rock-filled drum buried in the marl just outside the building.


Wall
This rather plain wall will have a set of shelves to hold the paint and yard/bug chemicals. I'll be using the standard and brackets type of shelving. As long as you anchor them with epoxy applied to the plastic wall anchors, the shelf system becomes basically bomb-proof.


Daisy's First Inspection Tour
Here's my newest supervisor. Her name is Daisy. She's a rescue dog and is about a year-and-a-half old. A sweet girl, she's a quick learner.

She's busy checking out the inside of the doorway, looking out to the landing.


I mentioned the rain. It's Monday now, and no work today. Heavy rain has been in the forecast, but of course, so far, we've had just a little. Maybe tomorrow.